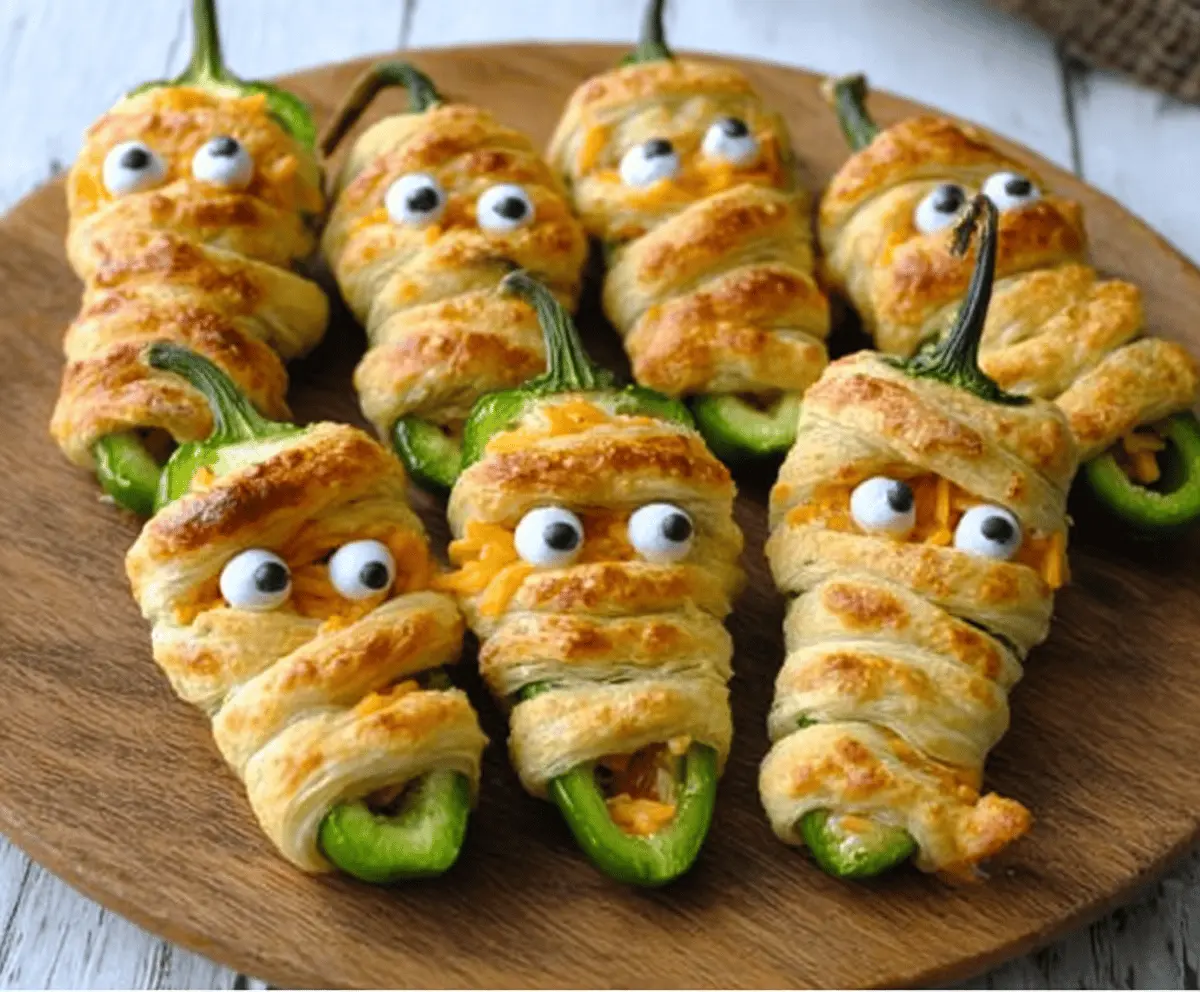
Halloween Jalapeño Popper Mummies are a fun and tasty twist on classic jalapeño poppers, wrapped up like little mummies! You get spicy jalapeños filled with creamy cheese, all snug in strips of golden, flaky pastry that look like mummy wrappings. They’re the perfect mix of spicy, cheesy, and crunchy—all in a cute Halloween-themed snack.
I love making these because they’re such an easy way to bring a festive touch to any party or Halloween gathering. Plus, the mummies always get a big laugh and everyone asks for the recipe. My secret is to make sure the cheese filling is smooth and creamy, and I add just enough seasoning to pack a little punch without being too hot for most people.
These little mummies are great served warm right out of the oven with a side of ranch or sour cream for dipping. I like to put them on a spooky platter with some fresh veggies and a few Halloween decorations to set the mood. They’re perfect for kids and adults alike, and they disappear fast—so make plenty!
Key Ingredients & Substitutions
Jalapeño Peppers: Fresh jalapeños add heat and crunch. If you want less spice, try mini sweet peppers or bell peppers as a milder option.
Cream Cheese & Cheddar: Cream cheese keeps the filling smooth and cheesy, while cheddar adds sharpness. You can swap cheddar for Monterey Jack or mozzarella for a milder flavor.
Puff Pastry: Puff pastry makes the mummy wraps flaky and golden. If you don’t have puff pastry, crescent roll dough works too but will be less flaky.
Edible Candy Eyeballs: These add a spooky, fun touch. If you don’t have candy eyes, small dots of cream cheese with black sesame seeds or olives work well too.
How Can I Wrap Jalapeños to Look Like Cute Mummies?
To get that perfect mummy look, here’s what helps:
- Cut puff pastry into thin strips about half an inch wide.
- Wrap the strips loosely and crisscross over the filled jalapeño so some cheese shows between the “bandages.”
- Leave a small gap for placing the candy eyes later — this makes the face stand out.
- Don’t wrap too tightly, or the pastry might not puff up well when baking.
- Brush the wrapped jalapeños with egg wash to get a nice golden color and help the strips stick.
- Bake until the pastry is puffed and golden, usually about 15-20 minutes.
A little patience wrapping each one carefully really makes a big difference and brings the mummies to life!
Equipment You’ll Need
- Baking sheet – perfect for holding the mummies while they bake evenly.
- Parchment paper – keeps the mummies from sticking and makes cleanup easy.
- Sharp knife – to slice jalapeños in half cleanly and safely.
- Spoon or small scoop – helps remove seeds and fill jalapeños neatly.
- Pastry brush – great for brushing egg wash to get that golden, shiny crust.
- Mixing bowl – for blending the cheese filling smoothly.
Flavor Variations & Add-Ins
- Swap cheddar for pepper jack cheese to add a little extra spice to the filling.
- Add cooked crumbled bacon for smoky, meaty flavor that pairs well with cheesy jalapeños.
- Mix in finely chopped fresh cilantro or green onions to brighten the filling and add freshness.
- Use mini sweet peppers instead of jalapeños for a mild, kid-friendly version without the heat.

Halloween Jalapeño Popper Mummies
Ingredients You’ll Need:
Main Ingredients:
- 8 large fresh jalapeño peppers
- 8 oz cream cheese, softened
- 1 cup shredded sharp cheddar cheese
- ½ tsp garlic powder
- ½ tsp onion powder
- ½ tsp smoked paprika (optional)
- Salt and pepper to taste
- 1 sheet puff pastry, thawed
- 1 egg, beaten (for egg wash)
- Edible candy eyeballs (about 16, 2 per mummy)
How Much Time Will You Need?
This fun and festive recipe takes about 10 minutes to prepare and roughly 15-20 minutes to bake. In just about 30 minutes total, you’ll have a spooky snack ready to wow your guests!
Step-by-Step Instructions:
1. Prep the Jalapeños:
Preheat your oven to 400°F (200°C) and line a baking sheet with parchment paper. Carefully wash each jalapeño, then slice them in half lengthwise. Use a spoon to gently scrape out the seeds and membranes to reduce the heat.
2. Make the Cheese Filling:
Mix the softened cream cheese, shredded cheddar, garlic powder, onion powder, smoked paprika (if using), salt, and pepper in a bowl until smooth and well combined. Fill each jalapeño half with this cheesy mixture, smoothing the tops nicely.
3. Wrap Your Mummies:
Roll out your thawed puff pastry and cut it into thin strips about ½ inch wide. Wrap the strips loosely around each cheese-stuffed jalapeño, leaving some spaces to peek through—that’s the mummy look! Leave a small gap near the top for the eyes.
4. Bake and Add Eyes:
Place the wrapped jalapeños on your prepared baking sheet and brush each with the beaten egg for a nice golden crust. Bake for 15-20 minutes or until the pastry is puffed and golden brown. Once out of the oven, quickly press two candy eyeballs onto each mummy’s exposed cheese area to give them spooky eyes.
5. Serve and Enjoy:
Let the mummies cool just a little before serving warm, alongside ranch or sour cream for dipping. They’re a spooky, tasty hit for any Halloween party!
Can I Use Frozen Jalapeños for This Recipe?
It’s best to use fresh jalapeños because frozen ones tend to be softer and release more moisture, which can make the pastry soggy. If you must use frozen, thaw them completely and pat dry before filling.
What Can I Substitute for Puff Pastry?
You can use crescent roll dough as a substitute, though it won’t be as flaky or crisp. Just wrap the cheese-filled jalapeños in the dough similarly and bake until golden.
How Do I Store Leftovers?
Store leftover mummies in an airtight container in the fridge for up to 2 days. Reheat them in the oven at 350°F for about 10 minutes to keep the pastry crispy.
Can I Make These Ahead of Time?
Yes! You can assemble the mummies and keep them covered in the fridge for a few hours before baking. Just add the candy eyeballs right after baking for the best results.
