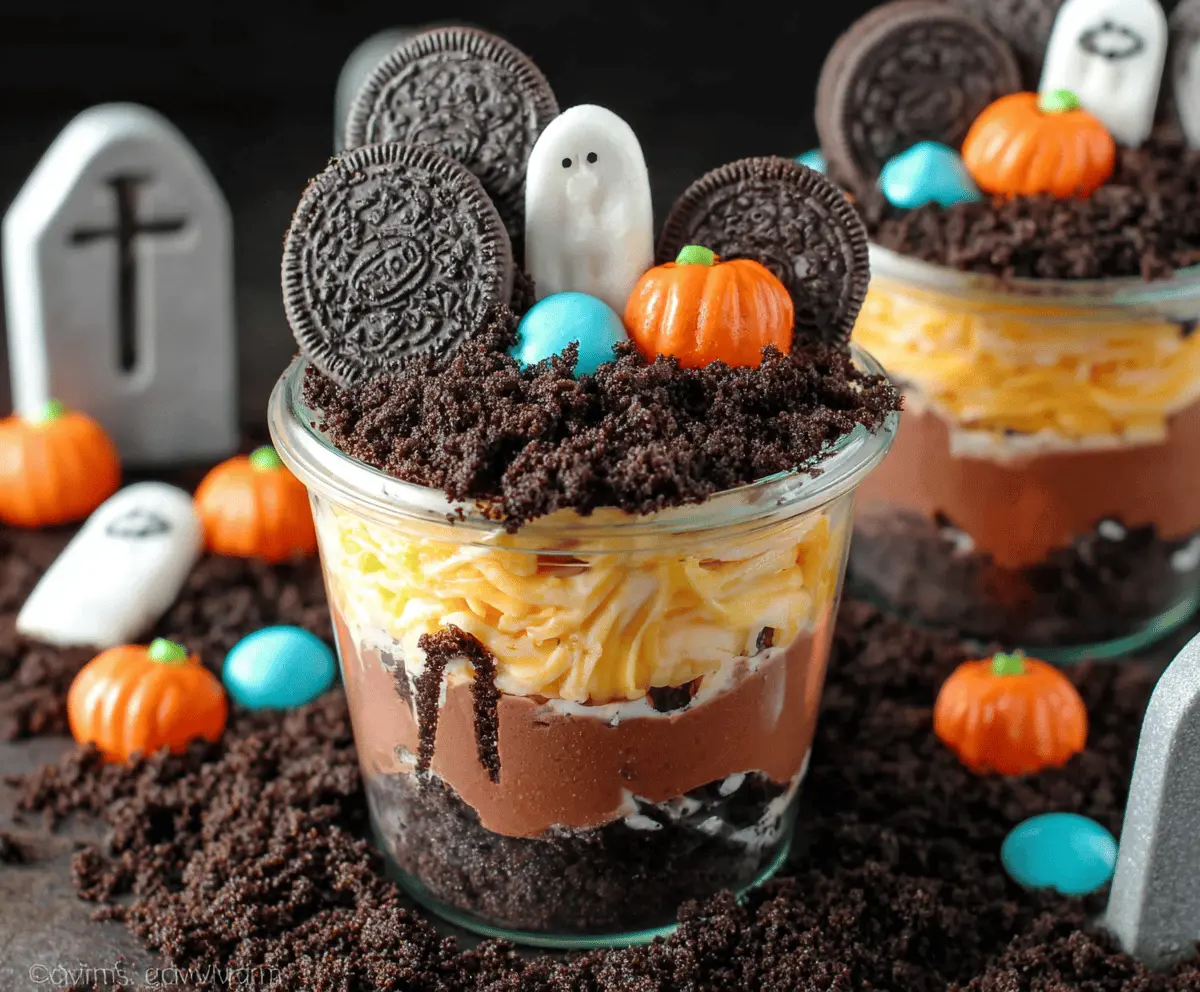
Halloween Graveyard Dirt Cups are a fun, spooky treat that’s perfect for celebrating the season. They usually start with creamy chocolate pudding layered with crushed Oreos to look like dirt, then topped with gummy worms, candy tombstones, and other creepy decorations. The mix of smooth pudding and crunchy cookie bits is a great texture combo that kids and adults both enjoy.
I love making these because they’re so easy to put together and you can get creative with the toppings. I always let the kids help decorate their own cups—that way each one looks a little different and you get to see all their imaginative ideas. Plus, it’s a great way to add a bit of Halloween spirit to your dessert table without any fuss.
My favorite way to serve these is in clear cups so everyone can see all the layers. They’re a hit at parties and family dinners, and they’re the perfect finishing touch after a big Halloween meal. If you want a quick, crowd-pleasing dessert that brings smiles and a little bit of spooky fun, these dirt cups are the way to go!
Key Ingredients & Substitutions
Oreos: These give you that perfect “dirt” look when crushed. If you want a dairy-free or gluten-free option, grab a similar cookie like gluten-free chocolate sandwich cookies or crushed chocolate graham crackers.
Heavy whipping cream: This is the base for the chocolate whipped cream layer. You can use canned coconut cream for a dairy-free version—it whips up nicely too!
Cocoa powder: Adds a rich chocolate flavor to the whipped cream. If you don’t have unsweetened cocoa, you could try Dutch-processed cocoa for a smoother taste.
Chocolate pudding (optional): Adds a creamy layer at the bottom. You can skip this for a lighter treat or use instant pudding mix to save time.
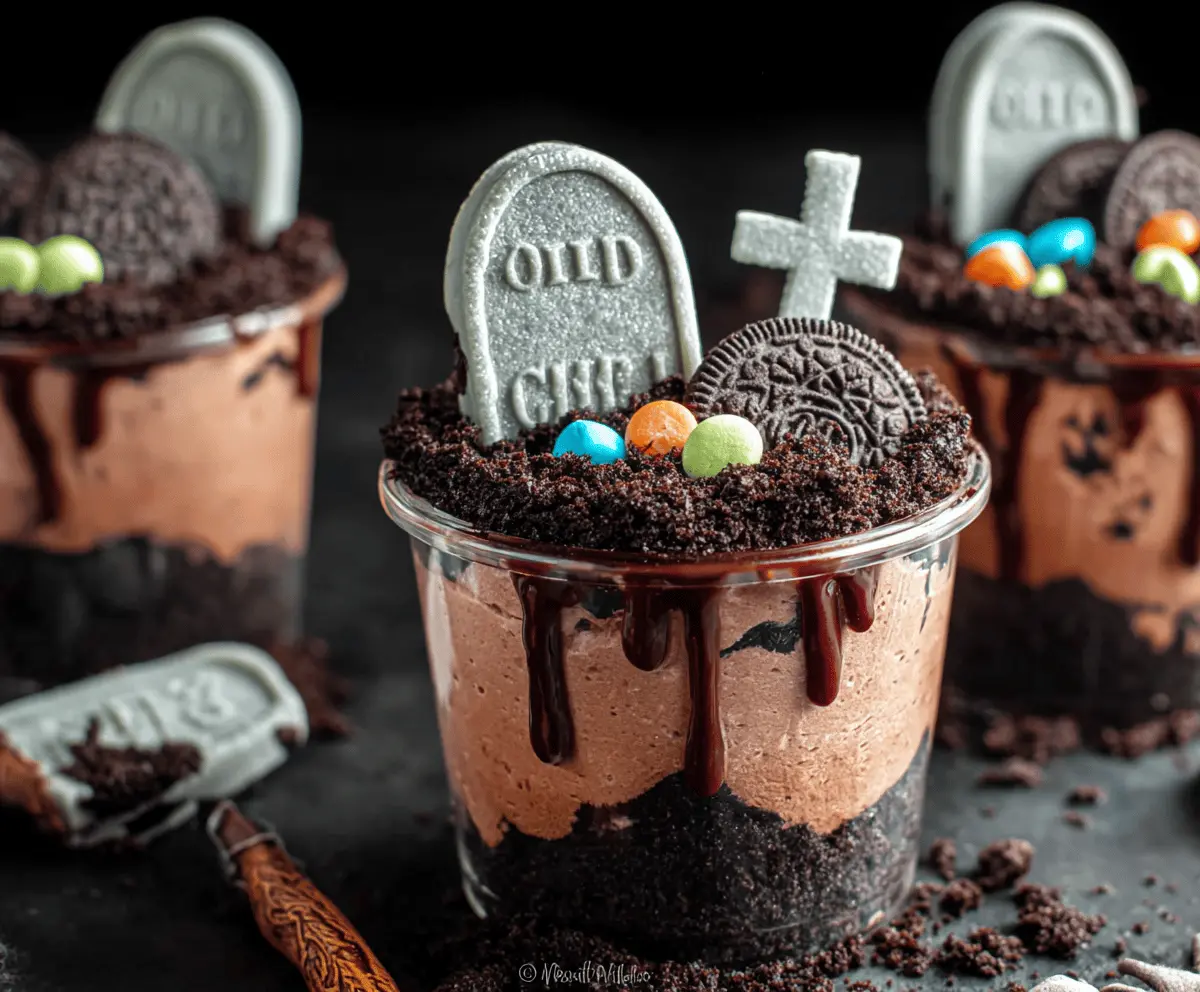
Chocolate syrup: Use this to create a gooey, spooky drizzle on the cups. Any store-bought chocolate sauce works well.
Halloween candy decorations: These make the cups fun and festive. If you don’t have candy tombstones, use broken pieces of chocolate bars or more Oreos stuck upright as “gravestones.”
How Do You Make the Whipped Cream Light and Fluffy Every Time?
Making perfect whipped cream is key for fluffy layers in these cups. Here’s what helps me:
- Use super cold heavy cream straight from the fridge—it whips up faster and better.
- Chill your mixing bowl and beaters in the fridge for 10-15 minutes before whipping.
- Start beating on medium speed until soft peaks form, then add sugar and cocoa powder.
- Beat just until stiff peaks form; stop right there to avoid over-whipping and turning it grainy.
- If it starts to look curdled, chill it and gently whisk again to smooth it out.
This whipped cream adds a light texture that balances the crushed cookie“dirt” nicely. It’s a simple step but makes a big difference!
Equipment You’ll Need
- Mixing bowls – big enough to whip cream and mix cookie crumbs comfortably.
- Electric mixer or hand mixer – makes whipping cream quick and fluffy without effort.
- Ziplock bag and rolling pin – perfect for crushing Oreos evenly and fast.
- Clear plastic cups or small glass jars – to show off the “dirt” layers and decorations.
- Spoons or piping bag – for layering the whipped cream neatly in each cup.
Flavor Variations & Add-Ins
- Swap chocolate whipped cream for peanut butter whipped cream for a nutty twist kids love.
- Add chopped strawberries or raspberries between layers for a fresh, tangy bite against the rich chocolate.
- Use mint Oreo cookies for a cool minty “dirt” flavor that feels fun and different.
- Drop in mini marshmallows or white chocolate chips for extra texture and sweetness.
Halloween Graveyard Dirt Cups
Ingredients You’ll Need:
For the Dirt:
- 1 package (14.3 oz) Oreo cookies (about 36 cookies), divided
For the Chocolate Whipped Cream:
- 2 cups cold heavy whipping cream
- 1/3 cup powdered sugar
- 1/4 cup unsweetened cocoa powder
- 1 teaspoon vanilla extract
Optional Chocolate Layer:
- 1/2 cup chocolate pudding (optional, for extra chocolate layer)
For Decorating:
- Chocolate syrup for drizzling
- Halloween-themed candy decorations (candy tombstones, gummy worms, candy-coated chocolates like M&Ms)
How Much Time Will You Need?
You’ll spend about 15-20 minutes preparing and assembling the cups, plus an extra hour of chilling time in the fridge to let everything set perfectly before serving.
Step-by-Step Instructions:
1. Crush the Cookies:
Put about 30 Oreos into a large ziplock bag, seal it tightly, and crush with a rolling pin until the cookies become fine crumbs. Set aside a few whole Oreos or crush some more coarsely for decoration.
2. Make the Chocolate Whipped Cream:
In a mixing bowl, beat the cold heavy whipping cream using an electric mixer until soft peaks form. Add powdered sugar, cocoa powder, and vanilla extract. Continue mixing until stiff peaks form and the cream becomes fluffy.
3. Layer the Cups:
If you’re using pudding, spoon a layer of chocolate pudding into the bottom of each cup. Next, add a generous layer of crushed Oreo crumbs on top of the pudding.
Then, pipe or spoon the chocolate whipped cream over the cookie crumbs. Add another sprinkle of Oreo crumbs on top, making it look like dirt.
4. Decorate and Chill:
Drizzle chocolate syrup down the sides of each cup for a spooky effect. Add your Halloween-themed candies, like candy tombstones and gummy worms, on top to make the cups look like mini graveyards.
Pop the cups in the fridge for at least 1 hour so everything gets nice and set.
5. Serve and Enjoy!
Pull the cups out of the fridge when ready, grab a spoon, and enjoy your delicious and festive Halloween graveyard dirt cups!
Can I Use Frozen Whipping Cream for This Recipe?
It’s best to use cold, but not frozen, heavy whipping cream. If your cream is frozen, thaw it overnight in the refrigerator and give it a gentle stir before whipping to ensure smooth, fluffy results.
Can I Make the Dirt Cups Ahead of Time?
Yes! You can assemble the cups up to a day in advance. Just cover them tightly with plastic wrap and keep them refrigerated. Add candy decorations right before serving for the freshest look.
How Should I Store Leftovers?
Store leftover cups in the refrigerator in airtight containers or covered with plastic wrap. They’ll stay fresh for up to 2 days, but the cookie “dirt” may soften slightly over time.
What Can I Use Instead of Oreos?
You can substitute Oreos with any chocolate sandwich cookies, crushed chocolate graham crackers, or gluten-free chocolate cookies if needed. Just crush them finely for the best dirt-like texture.
