No Bake Oreo Icebox Cake is a cool, creamy treat that’s incredibly simple to make and packed with layers of crunchy Oreo cookies and smooth, sweet cream. This cake doesn’t need an oven, which makes it perfect for those hot days when you want something delicious without turning on the heat. The cookies soak up the cream and soften overnight, creating a perfect, melt-in-your-mouth texture.
I love making this cake because it’s so fuss-free yet impressive. You just layer Oreos and whipped cream, and then let it rest in the fridge while you do other things or get some rest yourself. It’s one of those desserts that feels like a little magic is happening as the cookies soften up and the flavors come together. Plus, you can’t go wrong with Oreos—they always put a smile on everyone’s face!
My favorite way to enjoy this cake is after dinner with a scoop of vanilla ice cream on the side or just by itself with a cold glass of milk. It’s a great dessert to share with friends and family because it’s sweet and crunchy and creamy all at once, and you don’t have to wait long to have a slice. If you’re short on time or just want a fun, easy dessert, this No Bake Oreo Icebox Cake will be your new go-to!
Key Ingredients & Substitutions
Heavy Whipping Cream: This is what makes your cake light and fluffy. If you want a lighter option, try whipping coconut cream, but keep in mind it has a slight coconut taste.
Powdered Sugar: It sweetens and helps stabilize the whipped cream. You can swap in powdered erythritol or another fine sugar substitute if you want less sugar.
Vanilla Extract: Adds a warm flavor that balances the chocolate. If you don’t have vanilla, a tiny pinch of almond extract works well too.
Oreo Cookies: The star of this recipe! Use classic Oreos or any chocolate sandwich cookie you like. Gluten-free Oreos or similar cookies are great alternatives for gluten-sensitive diets.
Chocolate Syrup (Optional): Adds extra chocolate fun on top. You can drizzle caramel sauce or melted peanut butter instead for a twist.
How Do You Whip Cream to the Perfect Stiff Peaks?
Whipping cream can be tricky, but it’s key to getting that smooth, creamy texture. Here’s how I do it:
- Start with cold heavy cream straight from the fridge. Cold cream whips better and faster.
- Use a chilled bowl and beaters if you can. It helps the cream stay cold as you whip.
- Beat on medium-high speed until soft peaks form, then add sugar and vanilla.
- Continue whipping until firm and smooth stiff peaks form. You’ll see the cream hold its shape and not fall when you lift the beaters.
- Be careful not to overwhip or you’ll end up with butter! Stop as soon as you reach stiff peaks.
Equipment You’ll Need
- Large mixing bowl – perfect for whipping the cream without spills.
- Electric hand mixer or stand mixer – makes whipping cream quick and easy.
- 9×13 inch serving dish or pan – a good size for layering your cake evenly.
- Rubber spatula – helps spread the whipped cream smoothly between layers.
- Plastic wrap – to cover your cake while it chills in the fridge.
Flavor Variations & Add-Ins
- Swap Oreos for chocolate chip cookies or vanilla wafers for a different crunch and flavor.
- Add a layer of sliced strawberries or bananas for a fresh, fruity twist.
- Mix in a spoonful of instant coffee to the whipped cream for a mocha version.
- Try adding mini chocolate chips or crushed nuts between layers for extra texture.
No Bake Oreo Icebox Cake
Ingredients You’ll Need:
- 3 cups heavy whipping cream
- 1/3 cup powdered sugar
- 1 1/2 tsp vanilla extract
- 30-40 Oreo cookies (regular size)
- Chocolate syrup or melted chocolate for drizzle (optional)
How Much Time Will You Need?
This recipe takes about 15 minutes to prepare and then requires at least 4 hours of chilling in the refrigerator, or overnight if possible. The chilling time helps the cookies soften and the flavors meld into a delicious, creamy cake.
Step-by-Step Instructions:
1. Whip the Cream:
Pour the heavy whipping cream into a large mixing bowl. Using an electric mixer on medium-high speed, whip the cream until it starts to thicken. Then add the powdered sugar and vanilla extract. Continue whipping until stiff peaks form, meaning the cream holds its shape nicely when you lift the beaters.
2. Layer the Cake:
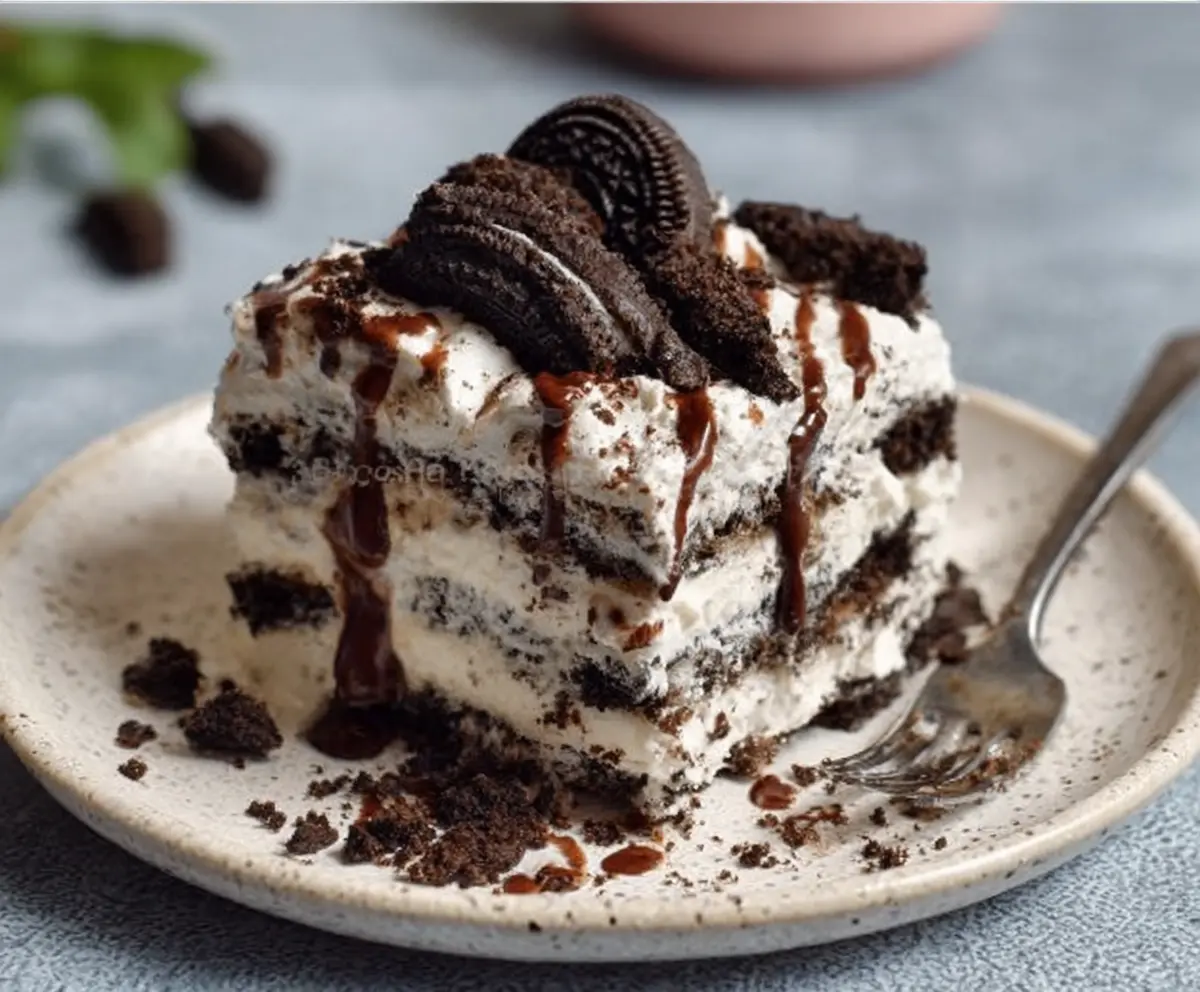
In a 9×13 inch serving dish, spread a thin layer of whipped cream on the bottom. Place a layer of Oreo cookies on top. You can keep the cookies whole or break some in halves if needed. Then spread a generous layer of whipped cream evenly over the cookies. Repeat these layers until you’ve used all the cookies and cream, finishing with a top layer of whipped cream.
3. Chill and Serve:
Sprinkle crumbled Oreos on top and drizzle with chocolate syrup if you like. Cover the dish with plastic wrap and chill in the refrigerator for at least 4 hours. This resting time lets the cookies absorb moisture and become soft. Once chilled, cut into squares and serve your creamy, chocolatey no bake Oreo icebox cake.
Can I Use Frozen Oreos for the Icebox Cake?
It’s best to use Oreos at room temperature so they soften properly during chilling. If your Oreos are frozen, let them thaw completely before assembling the cake.
Can I Make This Icebox Cake Ahead of Time?
Absolutely! In fact, preparing the cake a day ahead and letting it chill overnight gives the best results, allowing the cookies to soften perfectly and flavors to meld.
How Should I Store Leftover Icebox Cake?
Keep leftovers covered tightly in the refrigerator for up to 3 days. The cake may soften further, so it’s best enjoyed within a few days for ideal texture.
Can I Substitute the Oreos with Other Cookies?
Yes! Chocolate chip cookies, graham crackers, or vanilla wafers work well too. Just choose cookies that soften nicely when layered with whipped cream.