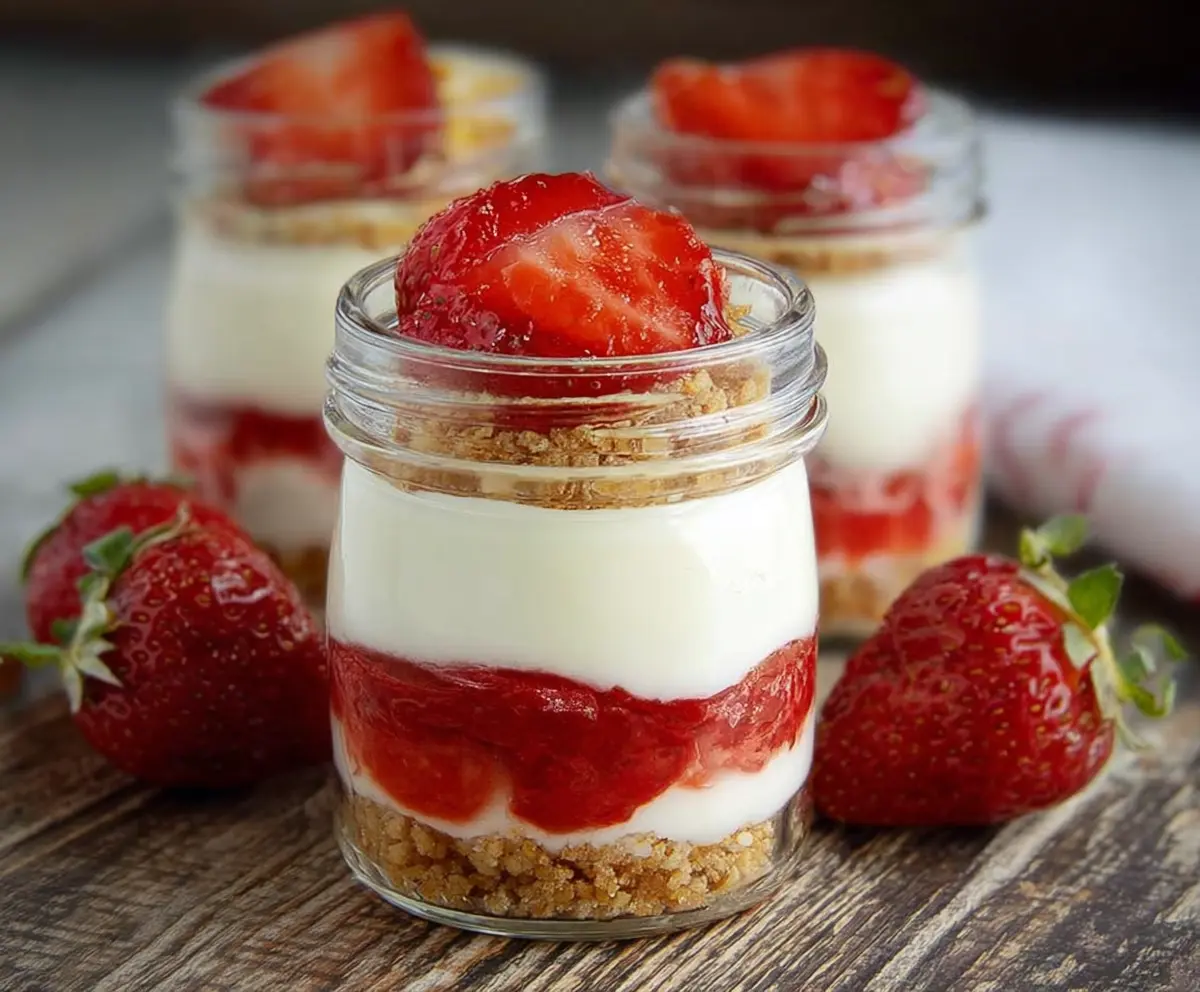
No-Bake Strawberry Cheesecake Jars are a delightful treat that’s both fresh and creamy. They layer crunchy graham cracker crumbs, smooth cream cheese filling, and sweet strawberry topping in little jars, making it easy to see and enjoy every bite.
I love making these jars because they come together so quickly, and there’s no oven needed—perfect for hot days or last-minute desserts. Plus, serving them in jars feels extra special and is great for sharing with friends or family. I usually like to add a little extra fresh strawberry on top for a pop of color and freshness.
These cheesecake jars are also one of those recipes that everyone seems to love. They’re just sweet enough without being too heavy, and the crunchy base makes a nice contrast to the creamy filling. I find they’re great for parties or just a simple weekend treat when I want something pretty and tasty without a lot of fuss.
Key Ingredients & Substitutions
Graham cracker crumbs: These give the jars a crunchy base. If you don’t have graham crackers, crushed digestive biscuits or vanilla wafers work well too. For a gluten-free option, try crushed gluten-free cookies or nuts.
Cream cheese: This makes the filling creamy and rich. Make sure it’s softened before mixing—it blends much easier and keeps the filling smooth. You can swap for mascarpone for a lighter texture or use a dairy-free cream cheese for a vegan version.
Heavy whipping cream: Whipped cream adds lightness and fluffiness to the filling. Chill your bowl and beaters before whipping for best results. You can replace it with coconut cream to keep it dairy-free, but the taste will be different.
Strawberries & jam: Fresh strawberries bring freshness and texture, while the jam adds sweetness and a glossy finish. If strawberries aren’t available, try raspberries or blueberries. You can also use homemade fruit compote instead of jam for a fresher flavor.
How Do You Get a Smooth, Fluffy No-Bake Cheesecake Filling?
Making the filling creamy and airy is key. Here’s how:
- Beat the cream cheese first until it’s very smooth before adding sugar and vanilla. This avoids lumps.
- Whip the cream until it forms stiff peaks—this means it holds shape when you lift the whisk.
- Fold the whipped cream gently into the cream cheese mix using a spatula. Don’t overmix! Use slow, wide movements to keep the air in the whipped cream.
This method keeps the filling light, fluffy, and creamy. It’s important to keep ingredients cold and mix gently for best texture.
Equipment You’ll Need
- Mixing bowls – a medium one for the crust and a large one for the filling to keep things organized.
- Electric hand mixer or stand mixer – makes beating cream cheese and whipping cream quick and smooth.
- Spatula – perfect for folding the whipped cream gently into the cream cheese without losing fluffiness.
- Spoons or piping bag – to layer the filling and toppings neatly into the jars.
- Small jars or dessert cups – great for serving and showing off the beautiful layers.
Flavor Variations & Add-Ins
- Swap strawberries for mixed berries like blueberries or raspberries to add a different fruity twist.
- Add a sprinkle of crushed nuts like almonds or pistachios on the crust or top for extra crunch and flavor.
- Mix in a tablespoon of lemon zest or a splash of lemon juice to the cream cheese for a bright, fresh taste.
- Use chocolate cookie crumbs instead of graham crackers for a rich, chocolatey base that pairs well with strawberries.
No-Bake Strawberry Cheesecake Jars
Ingredients You’ll Need:
For the Crust:
- 1 1/2 cups graham cracker crumbs (or digestive biscuits, crushed)
- 1/4 cup unsalted butter, melted
For the Cheesecake Filling:
- 8 oz (225 g) cream cheese, softened
- 1/3 cup granulated sugar
- 1 tsp vanilla extract
- 1 cup heavy whipping cream, chilled
For the Fruit Layers:
- 2 cups fresh strawberries, sliced
- ½ cup strawberry jam or strawberry preserves
- Fresh strawberries for garnish (optional)
How Much Time Will You Need?
This recipe takes about 20 minutes to prepare, plus at least 4 hours (or overnight) to chill in the fridge. The chilling step helps the cheesecake set and the flavors meld together, making it a perfect make-ahead dessert.
Step-by-Step Instructions:
1. Make the Crust:
In a medium bowl, mix the graham cracker crumbs with the melted butter until the mixture looks like wet sand. Press this mixture firmly into the bottom of your serving jars to form a crust. Put the jars in the fridge while you prepare the filling.
2. Prepare the Cheesecake Filling:
In a large bowl, beat the softened cream cheese, sugar, and vanilla extract together until smooth and creamy. In another chilled bowl, whip the heavy cream until stiff peaks form. Gently fold the whipped cream into the cream cheese mixture until everything is well combined and nice and fluffy.
3. Assemble the Jars:
Spoon or pipe a layer of the cheesecake cream over the crust in each jar. Next, add a layer of sliced fresh strawberries, followed by a thin spread of strawberry jam or preserves. Repeat with another layer of cheesecake cream on top. Finish with a spoonful of jam or a fresh strawberry as a pretty garnish.
4. Chill and Serve:
Cover the jars and place them in the refrigerator for at least 4 hours or overnight. This chilling time allows the cheesecake to set perfectly. Serve the jars chilled and enjoy your creamy, fruity dessert!
Can I Use Frozen Strawberries for This Recipe?
Yes, you can use frozen strawberries, but be sure to thaw and drain them well to avoid excess moisture making the filling runny. Pat them dry before layering in the jars.
How Long Can I Store These Cheesecake Jars?
Store the jars in the refrigerator covered tightly for up to 3 days. For best texture and flavor, try to enjoy them within 2 days.
Can I Make These Ahead of Time?
Absolutely! Prepare the jars up to 24 hours in advance and keep them refrigerated. The flavors will develop even more, making your dessert taste fantastic.
What Can I Use Instead of Graham Crackers?
If you don’t have graham crackers, crushed digestive biscuits, vanilla wafers, or even crushed pretzels work great for the crust and add nice texture.