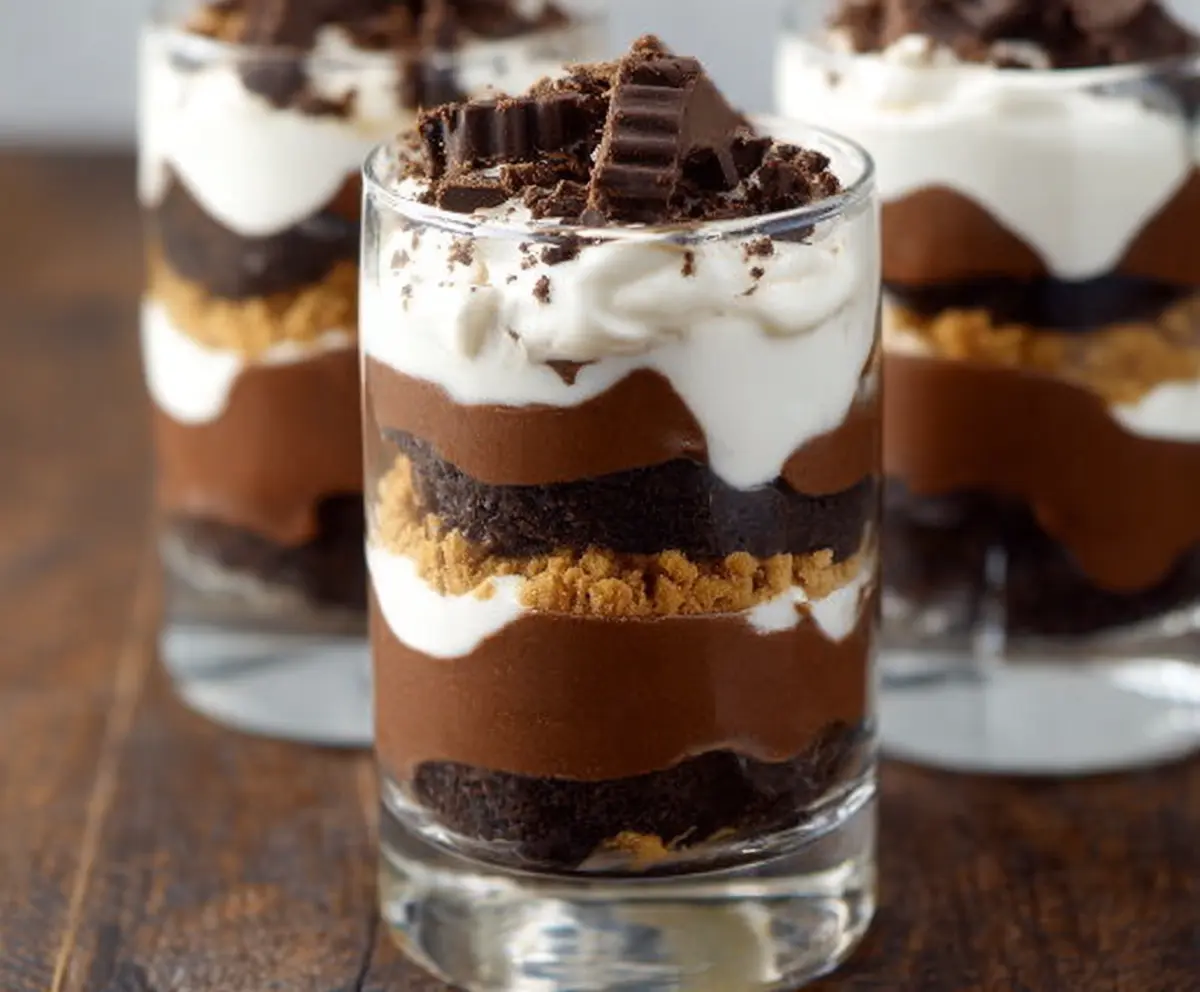
Peanut Butter Cup Parfaits are a delightful treat that layers creamy peanut butter, chocolate, and crunchy bits into a fun, easy dessert. With each spoonful, you get a mix of smooth peanut butter, rich chocolate, and a little crunch, making it a perfect combo of flavors and textures.
I love making these because they’re quick to put together and don’t require baking. Plus, they feel just a bit fancy even though they’re so simple. I usually add a sprinkle of chopped peanuts or some cookie crumbs on top to give that extra crunch that everyone loves.
These parfaits are great for sharing during a get-together or just when you want a sweet pick-me-up. I sometimes serve them in small glasses to make them look extra special, and they always disappear fast. If you’re a peanut butter fan like me, these will quickly become a go-to dessert!
Key Ingredients & Substitutions
Chocolate sandwich cookies: These give a nice crunchy base. Oreos are classic, but you can use any chocolate cookie you like. For a gluten-free option, try gluten-free chocolate cookies.
Heavy cream: Whipping cream helps create that light, fluffy texture. If you want a lighter version, you can use whipped coconut cream for a dairy-free substitute.
Peanut butter: Creamy peanut butter works best here for smooth layers. If you prefer less sweetness, choose natural peanut butter. For allergies, try sunflower seed butter as a swap.
Cream cheese: This adds richness and helps the peanut butter layer stay creamy. You can use vegan cream cheese if you want a dairy-free version.
Chocolate pudding: It adds chocolatey goodness and moisture. Instant pudding mixes are quick, but homemade pudding works too for a fresher taste.
Mini peanut butter cups: These make a fun topping. You can chop regular peanut butter cups or use chopped nuts or chocolate chips instead.
How Do You Layer Parfaits Without Making a Mess?
Layering parfaits looks great if you do it carefully. Here’s how to keep your layers clean and even:
- Use a spoon or small cookie scoop to add each layer slowly.
- For smooth spreads like the peanut butter layer, use a spatula or the back of a spoon to gently even it out.
- Chill the base crust before layering to help keep it from mixing with the creamy layers.
- Try to keep the glass steady on a flat surface while layering to avoid spills.
- Refrigerate once assembled to let layers set firmly, making serving easier.
Taking your time and layering gently will make your parfaits look as good as they taste!
Equipment You’ll Need
- Mixing bowls – A few sizes help keep your layers and ingredients separate and easy to mix.
- Electric mixer or whisk – Makes whipping the cream quick and gives you nice stiff peaks.
- Spatula or spoon – Perfect for folding ingredients gently and smoothing layers.
- Measuring cups and spoons – For accurate ingredient amounts to get the perfect balance.
- Clear parfait glasses or small jars – These show off the pretty layers and make serving easy.
Flavor Variations & Add-Ins
- Swap peanut butter for almond or cashew butter for a nutty twist without losing creaminess.
- Use chocolate mousse instead of pudding for a richer, silkier chocolate layer.
- Add sliced bananas or strawberries between layers for a fruity freshness that pairs well with peanut butter.
- Mix in crushed pretzels or nuts for extra crunch and a salty contrast.
Peanut Butter Cup Parfaits
Ingredients You’ll Need:
For the Crust:
- 1 cup chocolate sandwich cookies (e.g., Oreos), finely crushed
- 1/4 cup unsalted butter, melted
For the Whipped Cream:
- 1 cup heavy cream, cold
- 2 tablespoons powdered sugar
- 1/2 teaspoon vanilla extract
For the Peanut Butter Layer:
- 1 cup creamy peanut butter
- 1/2 cup cream cheese, softened
- 1/2 cup powdered sugar
Other Layers:
- 1 cup chocolate pudding (prepared or instant)
- Mini peanut butter cups, chopped, for garnish
How Much Time Will You Need?
This recipe usually takes about 20 minutes to prepare, plus at least 1 hour in the refrigerator to chill before serving. Chilling helps the layers set perfectly and lets the flavors come together.
Step-by-Step Instructions:
1. Prepare the Crust Base:
Mix the crushed chocolate cookies and melted butter in a bowl until it looks like wet sand. Press this mixture into the bottom of each parfait glass to form the base layer. Set aside.
2. Whip the Cream:
In a clean bowl, beat the cold heavy cream with powdered sugar and vanilla extract until stiff peaks form. Save a little bit of the whipped cream for topping later.
3. Make the Peanut Butter Layer:
In another bowl, beat the creamy peanut butter, softened cream cheese, and powdered sugar together until the mixture is smooth and creamy.
4. Assemble the Parfaits:
Start by spooning a layer of whipped cream over the crust. Then add a layer of chocolate pudding. Follow with another layer of whipped cream, and then spread the peanut butter mixture on top. Repeat the layers if your glasses are tall enough.
5. Top and Garnish:
Finish your parfaits with a dollop of the reserved whipped cream. Sprinkle chopped mini peanut butter cups and some crushed cookie crumbs on top for a delightful crunch and decoration.
6. Chill and Serve:
Place the layered parfaits in the fridge and chill for at least 1 hour before serving. This will help everything set nicely and make them easier to enjoy. Serve chilled and indulge!
Can I Use Store-Bought Whipped Cream Instead of Making My Own?
Yes, store-bought whipped cream works well and saves time! Just make sure it’s cold when layering, so it holds its shape nicely.
How Long Can I Store Peanut Butter Cup Parfaits?
You can store them in the refrigerator for up to 2 days in an airtight container or covered with plastic wrap. After that, the textures might start to soften.
Can I Make These Parfaits Ahead of Time?
Absolutely! Prepare the parfaits the day before your event and keep them chilled. The flavors will meld together, making them even tastier.
Is There a Good Substitute for Cream Cheese in the Peanut Butter Layer?
You can swap cream cheese with Greek yogurt or mascarpone for a lighter or tangier twist. Just keep an eye on the consistency to keep it creamy enough for layering.