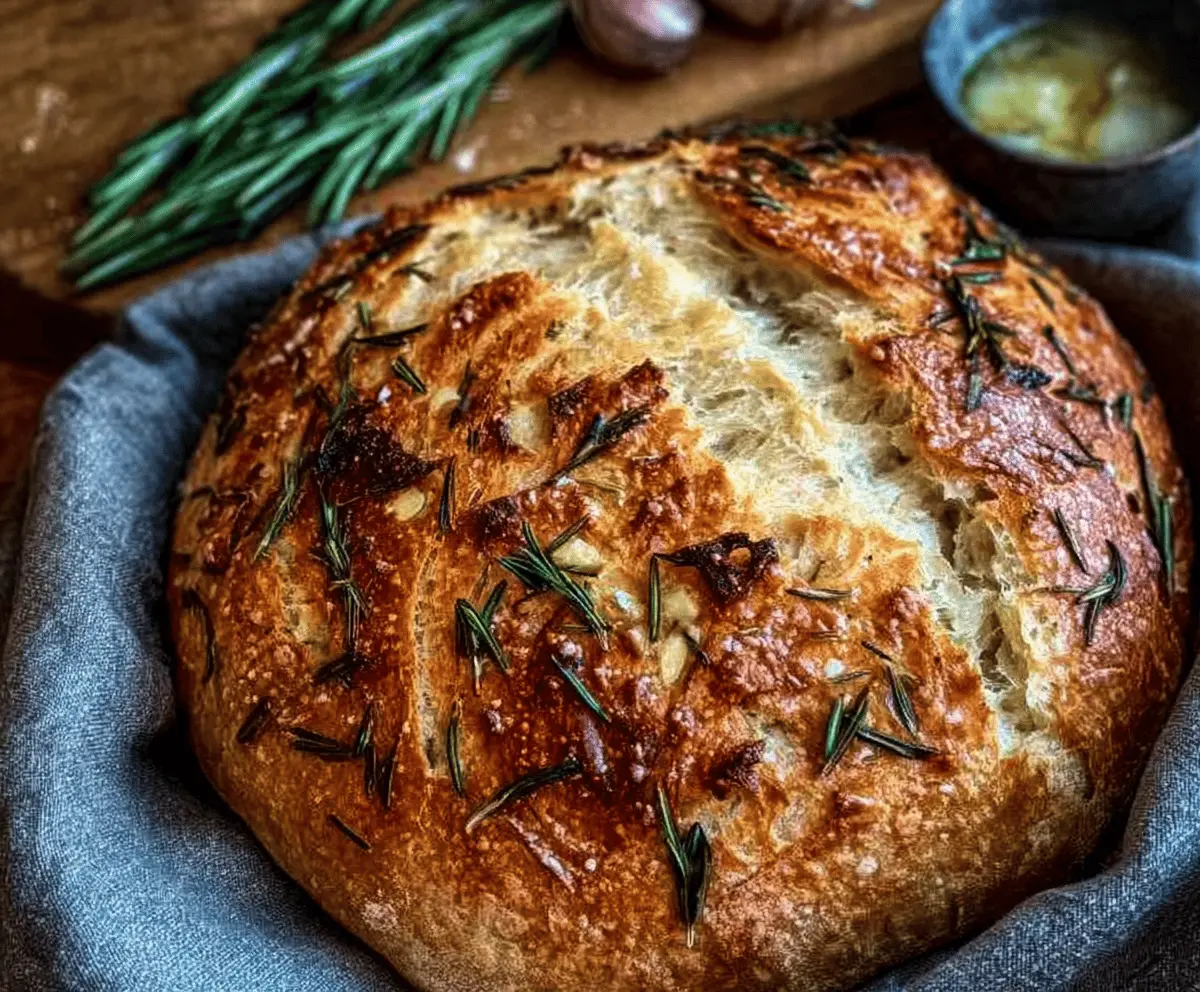
Rustic No-Knead Rosemary Garlic Bread is a simple, comforting loaf that’s bursting with the fresh flavors of rosemary and garlic. With its crusty outside and soft, chewy inside, this bread brings a homemade touch to any meal without needing hours of kneading or fuss.
I love how easy this bread is to make. Just mix up the ingredients, let the dough rest, and then bake it to golden perfection. The smell of garlic and rosemary baking fills the kitchen and feels like a warm hug on a chilly day. It’s such a pleasure to have homemade bread that doesn’t require a lot of work but tastes like you spent all afternoon on it.
My favorite way to enjoy this bread is warm with a little butter or alongside a bowl of soup. It’s great for gatherings too because it’s rustic and satisfying — people always ask for the recipe. Plus, that no-knead method means I can whip it up on a busy weekday and still wow everyone with fresh, delicious bread.
Key Ingredients & Substitutions
Flour: All-purpose flour works great here for a chewy but soft crumb. You can swap half for bread flour if you want a slightly chewier texture. Whole wheat flour adds nuttiness but may make the bread denser.
Rosemary: Fresh rosemary brings the best aroma and flavor. If you only have dried, use less—about 1 tablespoon—and crush it slightly to release oils.
Garlic: Thinly sliced fresh garlic creates those lovely roasted garlic bursts in the bread. If you want a milder taste, use minced garlic or garlic powder in the dough and keep slices just for the topping.
Olive Oil: Olive oil adds moisture and flavor. You can use a mild vegetable oil if preferred, but olive oil complements the rosemary and garlic best.
How Does No-Knead Bread Get Such a Great Texture?
The trick to no-knead bread is time. Letting the dough rest for 12-18 hours allows gluten to develop naturally without kneading. This slow fermentation also boosts flavor and creates air bubbles for a light crumb.
- Mix ingredients until combined; don’t worry about kneading.
- Cover and let dough sit at room temp for 12-18 hours until bubbly and doubled in size.
- Shape gently without pressing out air pockets to keep the light texture.
- Final rise before baking lets dough puff up and hold shape.
- Baking in a covered Dutch oven traps steam, creating a crisp crust.
Be gentle throughout, and don’t rush the rising times — patience is what makes the bread both tender inside and crusty outside.
Equipment You’ll Need
- Large mixing bowl – perfect for mixing dough without making a mess.
- Wooden spoon or spatula – helps you stir sticky dough easily without tough effort.
- Parchment paper – makes transferring dough into the pot simple and cleanup easier.
- Dutch oven or heavy ovenproof pot with lid – traps steam for a perfect crust and even baking.
- Sharp knife or bread lame – lets you score the dough to control how it expands while baking.
- Wire cooling rack – lets the bread cool evenly so the crust stays crisp.
Flavor Variations & Add-Ins
- Add ½ cup grated Parmesan or Pecorino cheese into the dough for a cheesy twist that pairs well with rosemary.
- Swap rosemary for fresh thyme or oregano if you want a different herbal note.
- Mix in ¼ cup chopped sun-dried tomatoes for a touch of sweetness and extra texture.
- Replace garlic slices with roasted garlic paste spread on top before baking for a milder, sweeter garlic flavor.
Rustic No-Knead Rosemary Garlic Bread
Ingredients You’ll Need:
- 3 cups all-purpose flour
- 1 ½ tsp salt
- 1 tsp active dry yeast
- 1 ½ cups warm water (about 110°F/43°C)
- 3 tbsp fresh rosemary leaves, chopped (plus extra for topping)
- 4 cloves garlic, thinly sliced (plus extra for topping)
- 2 tbsp olive oil (plus extra for drizzling)
How Much Time Will You Need?
This bread takes about 15 minutes to prepare, followed by a long resting period of 12 to 18 hours to let the dough rise and develop flavor. Then allow an extra 1 to 2 hours for a second rise before baking. Baking time is about 40 to 45 minutes, and cooling takes at least 1 hour. Plan ahead so you can enjoy fresh, homemade bread with minimal hands-on time!
Step-by-Step Instructions:
1. Mix the Dough:
In a large bowl, combine the flour, salt, and yeast. Stir to blend evenly. Pour in the warm water and olive oil, mixing everything together with a wooden spoon or spatula until you have a sticky dough. Fold in the chopped rosemary and garlic slices.
2. First Rise:
Cover the bowl tightly with plastic wrap or a kitchen towel. Let the dough rest at room temperature for 12 to 18 hours. You’ll know it’s ready when it’s doubled in size and bubbly on top.
3. Shape the Dough:
Lightly flour a clean surface and turn the dough out onto it. Gently shape it into a rough ball by folding the edges toward the center a couple of times. Place it seam side down on a piece of parchment paper, dust lightly with flour, and cover loosely with a towel. Let the dough rise again for 1 to 2 hours, until puffed.
4. Preheat and Prepare for Baking:
About 30 minutes before baking, preheat your oven to 450°F (230°C) with a Dutch oven or heavy ovenproof pot (with lid) inside. When hot, carefully remove the pot and transfer the dough on parchment paper into it. Drizzle some olive oil on top, then scatter extra rosemary needles and garlic slices.
5. Bake the Bread:
Use a sharp knife to score the top of the dough with a cross or several slashes. Cover the pot with its lid and bake for 30 minutes. Remove the lid and bake for an additional 10 to 15 minutes to get a beautifully browned, crusty loaf.
6. Cool and Serve:
Take the bread out of the oven and place it on a wire rack to cool for at least an hour before slicing. Serve warm with butter or your favorite side.
Can I Use Dried Rosemary Instead of Fresh?
Yes! Use about one-third of the amount when substituting dried rosemary for fresh. Crush it slightly to release flavor and mix it into the dough as usual.
Can I Make the Dough Ahead and Refrigerate It?
Absolutely! After mixing the dough, cover and refrigerate it for up to 24 hours. When ready to bake, bring it to room temperature and continue with the shaping and rising steps.
How Should I Store Leftover Bread?
Store leftover bread in a paper bag or bread box at room temperature to keep the crust crisp. For longer storage, slice and freeze the bread, then toast slices directly from the freezer.
Can I Skip the Dutch Oven?
While a Dutch oven helps create a crusty loaf by trapping steam, you can bake the bread on a preheated baking stone or heavy baking sheet. Place a pan of hot water in the oven to create steam for a better crust.