
The dried chiles turn fragrant in the Dutch oven in less than a minute, and that toasted smell is the first sign this pot is headed somewhere good. I used to rush past that step, but it’s worth staying close: the chiles should smell warm and fruity, not scorched. For this Texas chili, I soak them in beef broth, then blend them into a smooth paste that coats the seared beef instead of leaving flakes of chile in the pot.
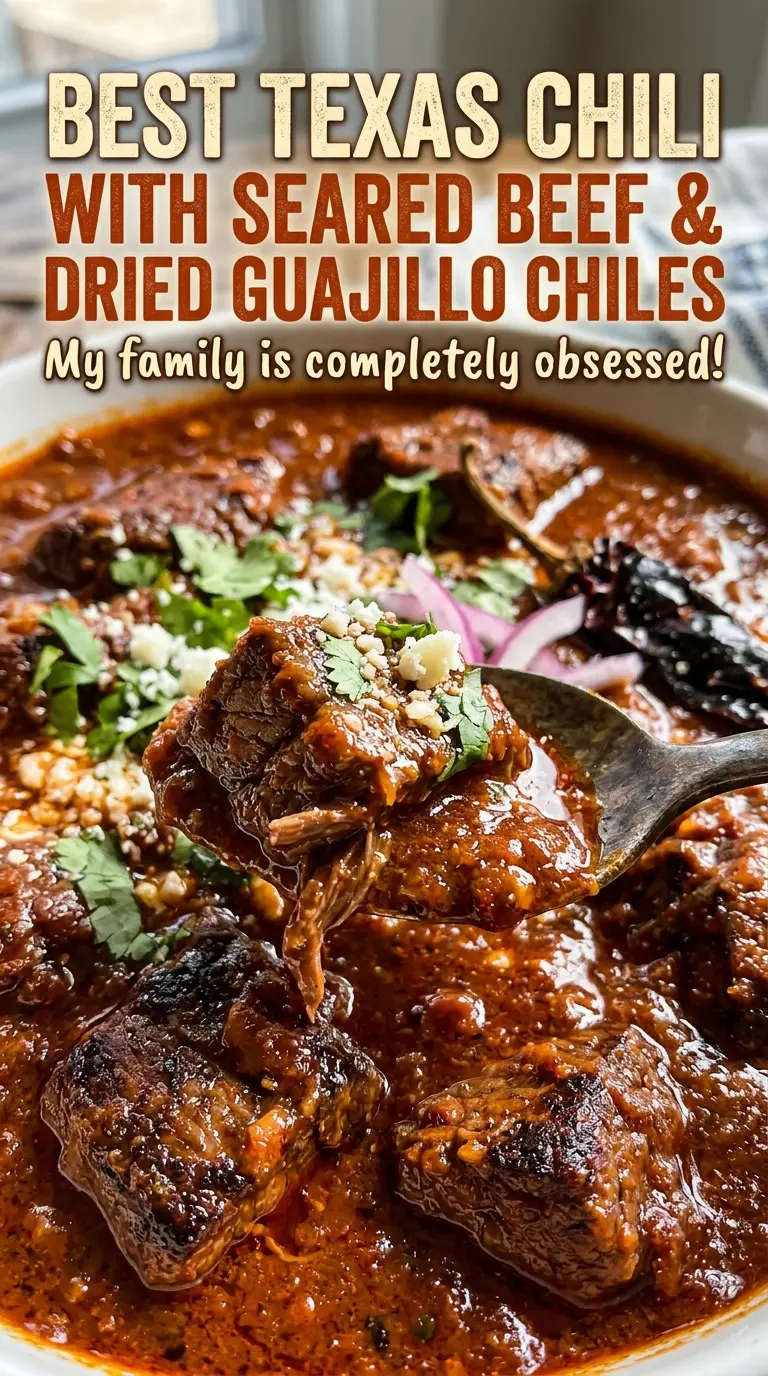
Chuck roast gives the chili its hearty, tender pieces, while a little masa harina thickens the broth without taking away the deep chile flavor. The beef needs a slow, gentle simmer, not a hard boil; give it time and it turns fork-tender in the rich, brick-red sauce. The finished chili is thick, savory, and built around beef and dried chiles.

Kitchen Note
Pat the beef dry before it hits the pot, then sear it in batches. If the pieces crowd each other, they’ll steam instead of browning; wait for several sides to develop a deep brown crust before moving them to the plate.
Save this Texas chili with seared beef and dried guajillo chiles for a pot of slow-braised beef in a smooth, deeply toasted chile sauce.
Why These Chiles Need a Broth Bath Before They Meet the Beef
Dried chiles can add plenty of flavor, but tossing them into the pot whole won’t give you the same even, rounded sauce. Toasting wakes up their aroma; soaking them in hot beef broth softens them so they’ll blend smoothly with the garlic, cumin, oregano, and vinegar. The soaking broth matters, too. It carries the chile flavor into the paste, so that flavor stays in the chili instead of being poured down the drain.
Blending the soaked chiles before braising also changes how the finished pot eats. You get a unified sauce that clings to the beef, rather than a thin broth with pieces of chile floating through it. The vinegar brings a small bright note alongside the earthy chiles and rich beef, while cumin and Mexican oregano round out the paste. This is a beef-and-chile chili, with no tomato competing with those flavors.
What the Guajillos, Anchos, and Chuck Each Bring to the Pot
- Guajillo and ancho chiles — Guajillos bring a bright, gently fruity chile flavor, while anchos add a deeper, rounder note. Buy pliable chiles that aren’t dusty or brittle if you can; stale chiles blend into a less lively paste. If you only have one of these two types, using that chile for the full mix works, though the balance will shift toward its flavor.
- Beef chuck roast — Chuck has the connective tissue and richness that suit a long, gentle braise. Cut it into even 1 1/2-inch cubes so the pieces cook at a similar pace, and pat them dry before seasoning. Pre-cut stew beef is a practical option if it’s chuck and the pieces are roughly the same size; a leaner cut won’t give the same tender, rich result.
- Beef broth — The broth softens the chiles and then becomes part of the braising liquid, carrying their flavor through the pot. A standard store-bought broth is fine here; the blended chiles and seared beef provide plenty of character.
- Masa harina — This corn flour thickens the chili and gives the sauce a subtle corn aroma. Whisk it with water until smooth before adding it; sprinkling it straight into the pot makes lumps more likely. Cornmeal isn’t an equal swap because it stays grainier.
- Apple cider vinegar and Mexican oregano — The vinegar keeps the chile paste from tasting one-note, and Mexican oregano gives it a distinctive herbal edge. Use Mexican oregano when available; it tastes different from the Mediterranean oregano more commonly kept in the pantry.
Building the Chile Paste and Braising the Beef Until Tender
Toast, Soak, and Blend the Chiles
Heat a 6-quart Dutch oven over medium heat and toast the stemmed, seeded guajillo and ancho chiles for 30 to 45 seconds per side, until fragrant. Move them to a heatproof bowl before they darken too much; scorched chiles can make the paste taste bitter. Simmer part of the beef broth in the pot, pour it over the chiles, and let them soak for 20 minutes. Blend the softened chiles with their soaking broth, garlic, cumin, oregano, and vinegar until smooth, venting the blender lid carefully to release steam.
Sear the Beef in Batches
Season the dry beef cubes all over with kosher salt and black pepper. Heat the neutral oil in the Dutch oven over medium-high heat, then brown the beef in batches, turning each piece to sear several sides; each batch takes about 3 to 4 minutes. Keep the pot from getting crowded so the meat can brown instead of releasing moisture into a crowded layer. Transfer the browned pieces to a plate as you work.
Soften the Onion, Then Let the Pot Braise
Add the diced onion to the pot and cook over medium heat, stirring, for about 5 minutes, until softened. Return the beef and any juices from the plate, then stir in the chile paste and the remaining beef broth. Bring everything to a gentle simmer, cover, and cook over low heat for 2 to 2 1/2 hours. A hard boil can make the beef tighten before it turns tender, so keep the bubbling quiet and check for meat that yields easily to a fork.
Thicken the Sauce and Let It Rest
Whisk the masa harina and water in a small bowl until no dry pockets remain, then stir the smooth mixture into the chili. Simmer uncovered for 10 to 15 minutes, until the sauce thickens and coats the beef; stir now and then so the bottom doesn’t catch. Take the Dutch oven off the heat and let the chili rest for 10 minutes before serving. The brief rest lets the sauce settle around the tender pieces.
Two Ways to Change the Chile Balance or the Beef Texture
Make the paste guajillo-forward or ancho-forward
Use all six dried chiles as guajillos for a brighter, fruitier paste, or all six as anchos for a deeper, earthier one. Keep the broth and the other paste ingredients unchanged, and blend the chiles with the same soaking liquid. The chili’s flavor shifts, but the method stays the same.
Serve it with shredded beef instead of cubes
Once the chuck is fork-tender, lift the pieces out and pull them apart with two forks, then return the meat to the pot before stirring in the masa mixture. The sauce will cling to strands of beef for a more spoonable texture. Keep the braise and its timing the same; the beef still needs to become fork-tender first.
Storage and Reheating
- Refrigerator: Store in a covered container for 3 to 4 days. The sauce will thicken as it chills.
- Freezer: This chili freezes well. Cool it, pack it in airtight freezer containers, and freeze for up to 3 months; thaw in the refrigerator before reheating.
- Reheating: Warm it gently in a covered saucepan over low heat, stirring occasionally, until it reaches 165°F. Avoid high heat, which can make the sauce stick before the center is hot.
Questions That Come Up When Making Texas Chili
Best Texas Chili with Seared Beef and Dried Guajillo Chiles
Ingredients
Equipment
Method
- Heat a 6-quart Dutch oven over medium heat and toast the guajillo and ancho chiles for 30 to 45 seconds per side, until fragrant.
- Transfer the toasted chiles to a heatproof bowl.
- Pour 2 cups of the beef broth into the Dutch oven and bring it to a simmer.
- Pour the simmering broth over the chiles and let them soak for 20 minutes.
- Transfer the chiles and soaking broth to a blender, add the garlic, cumin, oregano, and vinegar, and blend until smooth, venting the lid carefully to release steam.
- Season the beef cubes all over with the salt and black pepper.
- Heat the oil in the Dutch oven over medium-high heat and sear the beef in batches, turning to brown several sides, about 3 to 4 minutes per batch.
- Transfer the browned beef to a plate.
- Add the onion to the pot and cook over medium heat, stirring, until softened, about 5 minutes.
- Return the beef and any accumulated juices to the pot, then stir in the chile paste and the remaining 2 cups of beef broth.
- Bring the chili to a gentle simmer, cover, and cook over low heat for 2 to 2 1/2 hours, until the beef is fork-tender.
- Whisk the masa harina and water in a small bowl until smooth, then stir the mixture into the chili.
- Simmer uncovered for 10 to 15 minutes, until thickened.
- Remove the pot from the heat and let the chili rest for 10 minutes before serving.