
When the flour hits the hot butter-and-milk mixture, the dough changes quickly from a loose paste into a ball that pulls away from the pan. I watch for that thin film on the bottom before I move on; it’s a small cue that helps the puffs rise into hollow shells instead of staying heavy inside. Once I pipe the dough around its circle guide, the individual puffs bake into the wreath shape.
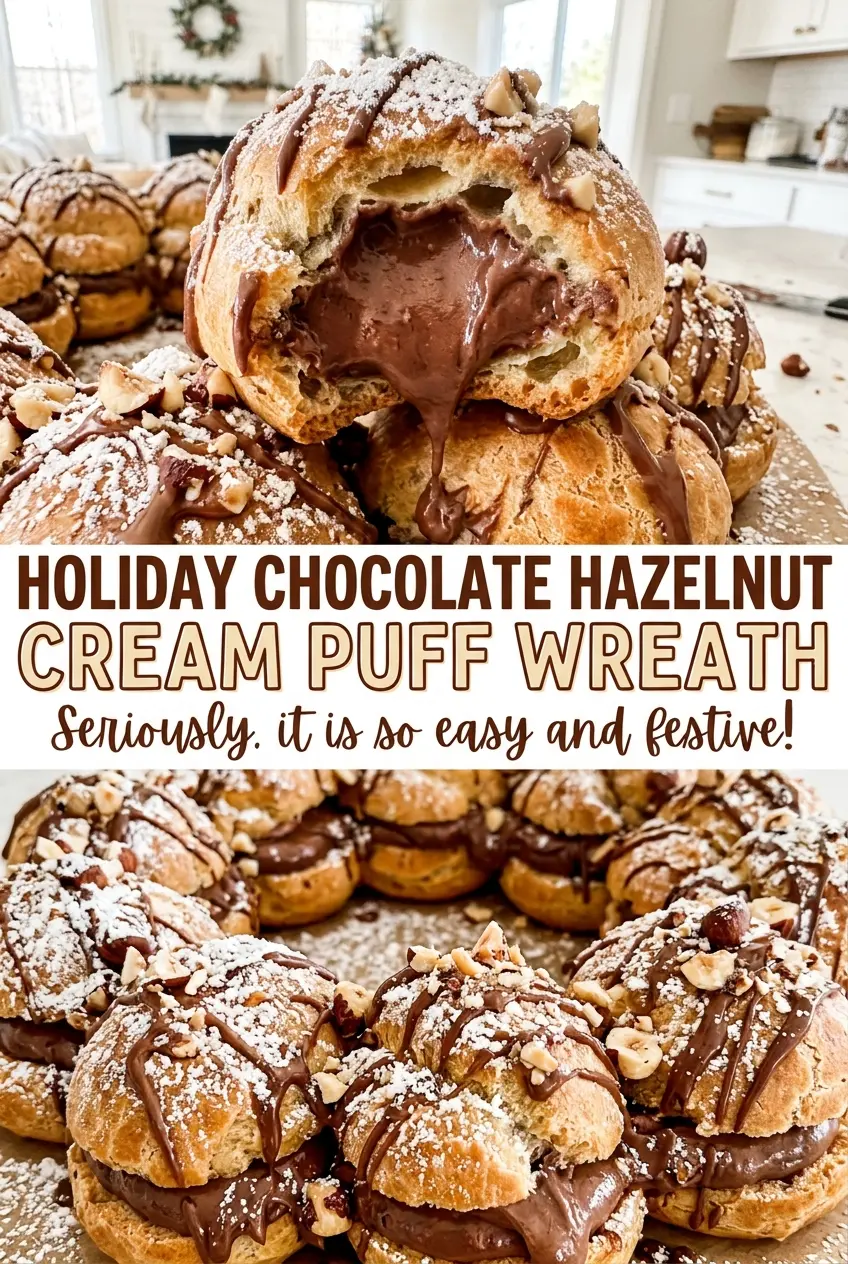
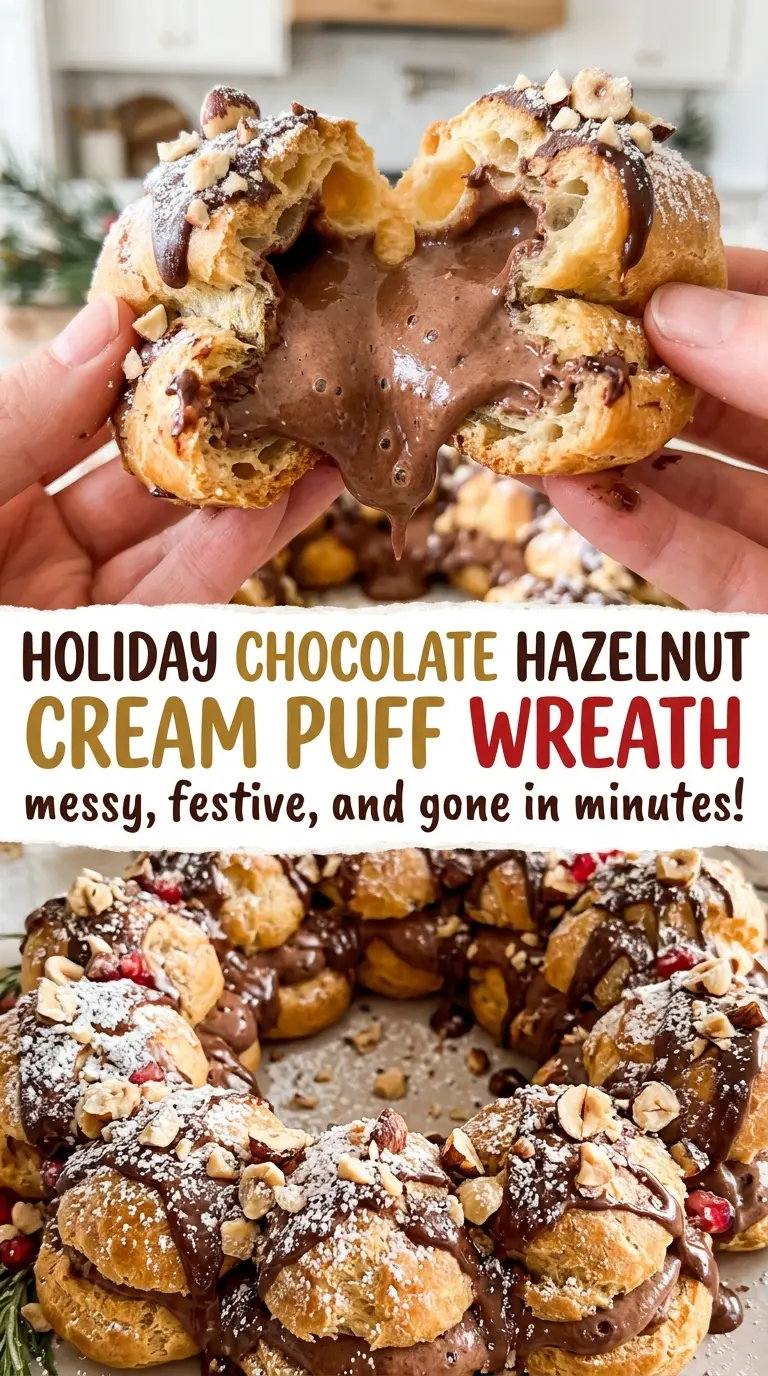
For this Holiday Chocolate Hazelnut Cream Puff Wreath, I fill each cooled shell with a light cream cheese and chocolate-hazelnut filling, then finish the ring with white chocolate and toasted hazelnuts. The two-stage bake gives the shells time to puff before they turn deeply golden, and the short rest in the cooling oven helps dry their centers. It’s a crisp-edged wreath with a soft, chocolatey center in every puff.
Kitchen Note
Add the eggs one at a time, and pause to check the dough before you pipe. It should look smooth and glossy, then fall from the spoon in a thick V; a stiff dough is harder to pipe evenly.
Save this chocolate hazelnut cream puff wreath for a celebration centerpiece: crisp golden shells, fluffy filling, and a white-chocolate finish.
Why This Wreath Is Baked as Separate Puffs, Not One Ring
A continuous ring of choux pastry and a wreath made from separate puffs may look similar on a platter, but they bake differently. Here, each mound has room to expand on its own, so the shells brown around their individual edges and keep a hollow center for filling. A single thick ring would need different proportions and baking time; using the smaller portions keeps the shells even and easy to fill.
The circle guide is there to make the wreath look intentional, not to press the puffs together. Twelve evenly spaced mounds form the ring, and the open gaps give them room as they rise. After baking, the filled puffs come together on the serving platter, where their round tops and the white-chocolate drizzle make the wreath shape clear. Since each piece is separate, guests can lift one puff from the platter without cutting through a large pastry.
There’s also a practical benefit: the filling goes into each shell rather than being spread between layers. That gives every portion the same balance of pastry and cream, and the sliced tops leave the filling visible beneath the drizzle. Let the shells cool completely before filling so their centers stay dry and the cream holds its shape.
Why the Filling Needs Both Cream Cheese and Whipped Cream
- Cream cheese and chocolate-hazelnut spread — Cream cheese gives the filling body and a little tang, while the spread brings the chocolate-hazelnut flavor. Let the cream cheese soften before beating so it blends smoothly instead of leaving small lumps.
- Chilled heavy cream — Heavy cream whips into the airy structure that keeps the filling from feeling dense. Keep it cold until you’re ready to whip; half-and-half won’t reach the same peaks, so it isn’t a good stand-in here.
- Eggs — The eggs help the choux shells rise and set around a hollow center. Room-temperature eggs incorporate more readily into the dough than cold ones, which makes it easier to reach a smooth, pipeable consistency.
- Whole milk and butter — Milk adds richness to the dough, while butter contributes flavor and helps form the panade. If you don’t have whole milk, use the same amount of water instead; the shells will be less rich and may brown a little less.
- White chocolate and toasted hazelnuts — White chocolate sets into a sweet finish, and toasted hazelnuts add crunch that contrasts with the soft filling. Chopped nuts toast more evenly when the pieces are similar in size, so check that they’re cool before scattering them over the wreath.
- All-purpose flour — It gives the shells the structure needed to puff and hold their shape. A direct swap for a gluten-free flour blend isn’t reliable in this choux dough, where the flour’s structure matters to the finished shells.
How to Get Hollow Choux Shells and a Filling That Holds
Cook the Flour into a Smooth Panade
Heat the oven to 425°F and line a large rimmed baking sheet with parchment. Trace a 9-inch circle, then turn the parchment over so the pencil mark sits underneath. Bring the water, milk, butter, sugar, and salt to a boil in a medium saucepan over medium heat, stirring until the butter melts. Take the pan off the heat, add all the flour at once, and stir until no dry flour remains.
Return the pan to medium-low heat and stir for 1 to 2 minutes. The dough should gather into a ball and leave a thin film on the bottom of the pan. Transfer it to a bowl and stir for 5 minutes to cool slightly before adding the eggs.
Incorporate the Eggs Without Losing the Dough’s Structure
Add the room-temperature eggs one at a time, mixing until each is incorporated before adding the next. The finished dough should be smooth and glossy, not grainy or stiff. When lifted on a spoon, it should fall in a thick V. If you rush the egg additions, the dough can look uneven; keep mixing each addition until it comes together.
Pipe Even Mounds and Bake Through
Transfer the dough to a piping bag fitted with a 1/2-inch round tip. Pipe 12 evenly spaced mounds, about 1 1/2 inches wide, along the circle guide. Bake for 15 minutes at 425°F, then reduce the oven to 350°F without opening the door. Continue baking for 20 to 25 minutes, until the puffs are deep golden brown and firm.
If the shells are pale or still feel soft, they need more time in the oven; underbaked puffs are more likely to sink as they cool. Poke a small hole in the side of each puff with a paring knife, turn off the oven, and leave the door cracked for 5 minutes. Move the shells to a wire rack and cool them completely before filling.
Fold the Cream Filling Gently
Beat the softened cream cheese and chocolate-hazelnut spread in a medium bowl until smooth. In a separate bowl, whip the chilled heavy cream with the confectioners’ sugar and vanilla until medium-stiff peaks form. Fold one-third of the whipped cream into the cream cheese mixture first to lighten it, then gently fold in the rest. Stop once the mixture is even; vigorous stirring knocks air out of the cream.
Fill Each Puff and Finish the Wreath
Use a serrated knife to slice the top third off each cooled puff. Pipe about 3 tablespoons of filling into each base, replace the tops, and arrange the filled puffs in a wreath on a serving platter. Melt the chopped white chocolate in a microwave-safe bowl at 50% power, stirring every 15 seconds until smooth. Drizzle it over the wreath, scatter the toasted hazelnuts on top, and let the chocolate set for 10 to 15 minutes before serving.
Two Easy Ways to Change the Chocolate-Hazelnut Wreath
Use a darker chocolate drizzle
Swap the white chocolate for the same amount of chopped semisweet or bittersweet chocolate and melt it the same way. The darker finish is less sweet and gives the hazelnut topping a more pronounced chocolate contrast.
Trade the hazelnuts for toasted almonds
Use chopped toasted almonds in place of the hazelnuts for a milder, slightly different crunch. Keep the pieces small enough to scatter over the wreath, and let them cool after toasting so they don’t soften the chocolate drizzle.
Storage and Reheating
- Refrigerator: Cover and refrigerate the filled wreath within 2 hours. It’s best within 1 day; the shells soften as they sit beside the cream filling.
- Freezer: Freeze unfilled shells in an airtight container for up to 1 month. Thaw them completely before adding the filling; the assembled wreath doesn’t freeze well because the cream filling and pastry lose their texture.
- Reheating: Don’t reheat the filled wreath. Serve it cool; warming it loosens the cream filling and softens the shells further.
Questions That Come Up When Making Choux Wreaths
Holiday Chocolate Hazelnut Cream Puff Wreath
Ingredients
Equipment
Method
- Heat the oven to 425°F.
- Line a large rimmed baking sheet with parchment paper.
- Trace a 9-inch circle on the parchment, then turn the paper over so the mark is underneath.
- Combine the water, whole milk, unsalted butter, granulated sugar, and kosher salt in a medium saucepan over medium heat; bring to a boil, stirring until the butter melts.
- Remove the pan from the heat, add the all-purpose flour all at once, and stir vigorously until no dry flour remains.
- Return the pan to medium-low heat and stir for 1 to 2 minutes, until the dough forms a ball and leaves a thin film on the bottom of the pan.
- Transfer the dough to a bowl and stir for 5 minutes to cool slightly.
- Add the eggs one at a time, mixing until each is incorporated and the dough is smooth, glossy, and falls from a spoon in a thick V.
- Transfer the dough to a piping bag fitted with a 1/2-inch round tip and pipe 12 evenly spaced mounds, about 1 1/2 inches wide, along the circle guide.
- Bake for 15 minutes at 425°F, then reduce the oven to 350°F without opening the door and bake for 20 to 25 minutes, until the puffs are deep golden brown and firm.
- Poke a small hole in the side of each puff with a paring knife, turn off the oven, and leave the puffs inside with the door cracked for 5 minutes.
- Transfer the puffs to a wire rack and cool completely.
- Beat the cream cheese and chocolate-hazelnut spread in a medium bowl until smooth.
- In a separate bowl, whip the heavy cream, confectioners' sugar, and vanilla extract until medium-stiff peaks form.
- Fold one-third of the whipped cream into the cream cheese mixture to lighten it, then gently fold in the rest.
- Slice the top third off each cooled puff with a serrated knife.
- Pipe about 3 tablespoons of filling into each puff base, replace the tops, and arrange the filled puffs in a wreath on a serving platter.
- Melt the white chocolate in a microwave-safe bowl at 50% power, stirring every 15 seconds, until smooth.
- Drizzle the white chocolate over the wreath, scatter the hazelnuts on top, and let the chocolate set for 10 to 15 minutes before serving.