
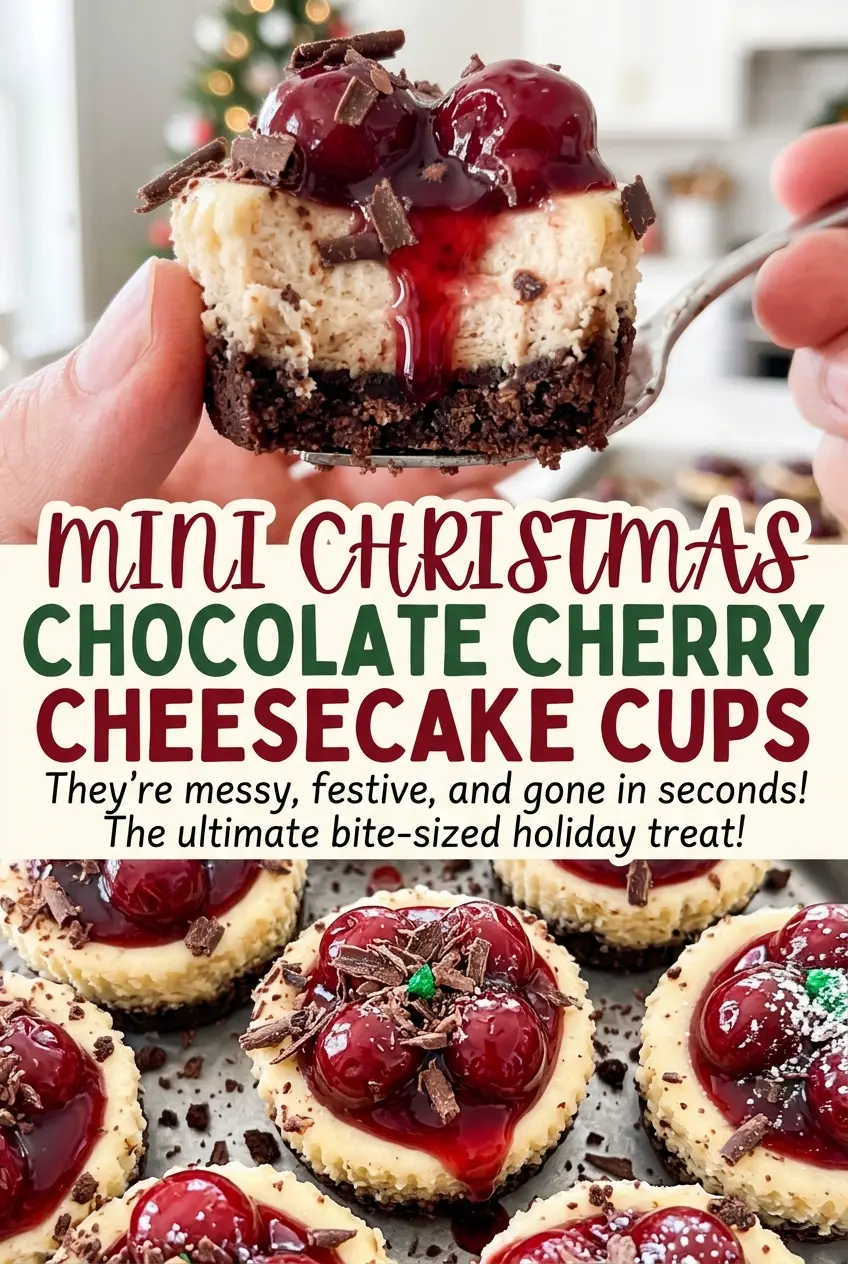
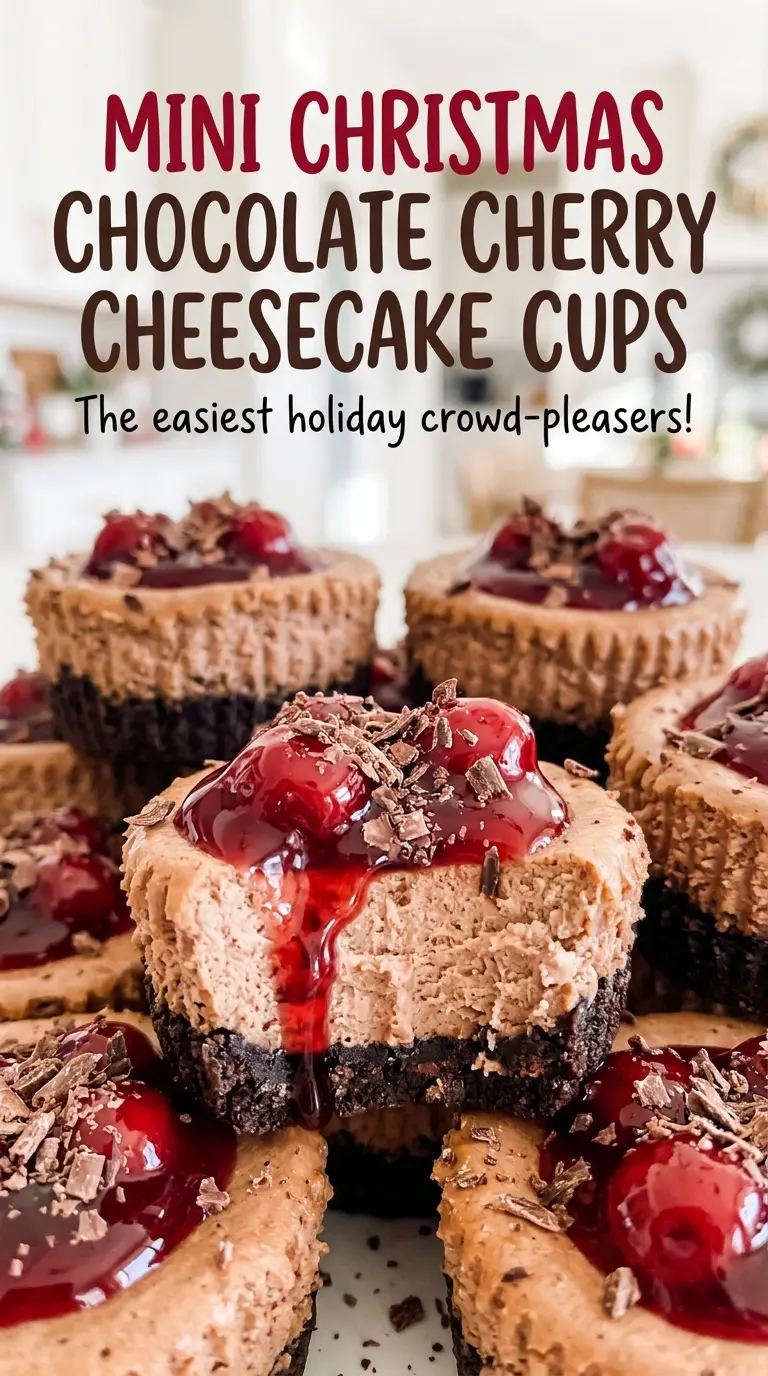
The glossy cherry topping catches the light first; then the chocolate cookie base makes each cup feel like a tiny, complete dessert instead of a slice cut from a big cheesecake. I made Mini Christmas Chocolate Cherry Cheesecake Cups for that neat, no-slicing format, and each one gets a red-and-green finish without a piping bag or extra decorating. The contrast is what keeps them balanced: deep chocolate below, bright cherry above.
Semisweet chocolate and unsweetened cocoa give the filling a fuller chocolate taste than a vanilla cheesecake with chocolate on top, while sour cream keeps the middle creamy. A whole chocolate sandwich cookie adds a little crunch beneath the soft filling. These look festive, but they’re made with familiar baking ingredients and a standard muffin pan, so they’re easy to fit into a busy baking day.
Kitchen Note
Give the melted chocolate its full five minutes to cool before it goes into the cream cheese. If it’s still hot, it can warm the filling and make the batter harder to mix smoothly.
Save these Mini Christmas Chocolate Cherry Cheesecake Cups for a festive dessert with a rich chocolate center and bright cherry topping.
Why These Cheesecake Cups Need a Little Jiggle Before the Fridge
Cheesecake doesn’t finish setting in the oven the way a muffin does. If you wait until the centers look firm, they’re likely already overbaked; the edges should be set while the middle still moves slightly when the pan is nudged. That small wobble can look like a warning, but it’s the cue that keeps the centers creamy instead of dry.
These cups also spend time cooling in the pan and then chilling in the refrigerator. That gradual cooling helps the filling firm up without asking the oven to do all the work. The chilled texture is part of what makes the individual portions easy to lift and top. A little patience at this stage gives you a smooth, sliceable cheesecake center in a cup-sized serving.
- Look for set edges rather than a completely firm surface.
- Don’t keep baking just to remove every bit of movement from the center.
- Let the refrigerator finish firming the cups before you add the topping.
What the Cookie Base and Two Chocolates Bring to Each Cup
- Chocolate sandwich cookies — A whole cookie forms the base without needing to crush crumbs or mix a separate crust. A regular grocery-store brand works well; the cookie’s texture matters more than choosing a premium one. For a gluten-free option, use gluten-free chocolate sandwich cookies that fit the muffin liners.
- Cream cheese — Use block-style cream cheese and let it soften so it beats smooth. Whipped cream cheese has more air and a looser texture, which can make the filling less consistent. Scraping the bowl helps catch any firm bits before the other ingredients go in.
- Semisweet chocolate and unsweetened cocoa — The melted chocolate gives the filling body, while cocoa brings a direct, concentrated chocolate taste. A standard semisweet baking bar is fine; chop it into small pieces so it melts evenly. The cocoa should be unsweetened, so the filling doesn’t get sweeter than intended.
- Eggs and sour cream — Room-temperature eggs blend more readily into the cream cheese mixture, and adding them one at a time helps keep the filling even. Sour cream brings a gentle tang and creamy texture. Plain full-fat Greek yogurt can stand in for it in the same quantity, with a slightly tangier result.
- Cherry pie filling and holiday sprinkles — A thick cherry filling sits nicely on top of the chilled cups, and a standard store-bought version is all you need. The sprinkles add color and a little crunch, so choose the red-and-green kind you like; there’s no need for a specialty brand.
Build the Filling Smoothly, Then Let the Centers Set
Set Up the Cookie Bases
Heat the oven to 325°F and line a standard 12-cup muffin pan with paper liners. Place one chocolate sandwich cookie in the bottom of each liner. Keep the cookies flat so the filling has an even base to sit on.
Melt and Cool the Chocolate
Microwave the chopped semisweet chocolate at 50% power in 30-second intervals, stirring after each interval. Continue until the chocolate looks smooth, with no firm pieces remaining. Let it cool for 5 minutes before adding it to the filling; hot chocolate can make the mixture warm and difficult to blend evenly.
Mix Without Overworking the Eggs
Beat the softened cream cheese until smooth, then beat in the sugar and unsweetened cocoa powder. Scrape down the bowl so no cream cheese is left stuck along the sides. Beat in the cooled melted chocolate, then add the eggs one at a time and mix just until combined. Finish with the sour cream and vanilla.
Bake to the Right Center Texture
Divide the filling among the lined cups and bake for 18–22 minutes. The edges should look set, while the centers still have a slight jiggle. If the whole surface looks firm in the oven, the cups have gone farther than they need to; take them out when the middle still moves a little.
Cool, Chill, and Add the Topping
Cool the cheesecakes in the pan for 30 minutes, then refrigerate them in the pan for at least 3 hours, until fully chilled. Lift the chilled cups from the pan before adding the topping. Spoon cherry pie filling over each one and finish with the red-and-green sprinkles.
Two Simple Ways to Adapt These Chocolate Cherry Cups
Make the Cookie Base Gluten-Free
Swap in gluten-free chocolate sandwich cookies, choosing ones that fit the paper liners. Use one cookie in each cup and keep the rest of the method the same. The base may have a slightly different crunch depending on the cookie brand, but the chocolate-and-cherry combination stays intact.
Choose a Chunky or Smoother Cherry Top
For a smoother finish, gently mash the cherry pie filling with the back of a spoon before topping the chilled cups. Leave it as it is for visible whole cherries and a more textured topping. Either way, add the sprinkles after the filling is on each cheesecake.
Storage and Serving
- Refrigerator: Store the covered cups for up to 4 days. The cookie base softens as it sits, but the cheesecake stays creamy.
- Freezer: Freeze the fully chilled cups without the cherry topping in an airtight container for up to 1 month. Thaw them overnight in the refrigerator, then add the topping and sprinkles.
- Serving: Serve chilled. These are best kept cold rather than warmed, since heating softens the cheesecake filling and cherry topping.
Questions That Come Up When Making These Cheesecake Cups
Mini Christmas Chocolate Cherry Cheesecake Cups
Ingredients
Equipment
Method
- Heat the oven to 325°F.
- Line a standard 12-cup muffin pan with paper liners.
- Place one chocolate sandwich cookie in the bottom of each liner.
- Microwave the chopped chocolate at 50% power in 30-second intervals, stirring each time, until smooth.
- Cool the melted chocolate for 5 minutes.
- Beat the cream cheese until smooth.
- Beat in the sugar and cocoa powder, scraping down the bowl as needed.
- Beat in the melted chocolate.
- Add the eggs one at a time, mixing just until combined.
- Beat in the sour cream and vanilla.
- Divide the filling among the lined cups.
- Bake for 18–22 minutes, until the edges are set and the centers still have a slight jiggle.
- Cool the cheesecakes in the pan for 30 minutes.
- Refrigerate the cheesecakes in the pan for at least 3 hours, until fully chilled.
- Lift the chilled cheesecakes from the pan.
- Spoon cherry pie filling over each one.
- Finish with the holiday sprinkles.