
The first thing you notice when Oreo crumbs meet melted butter is how quickly they turn from loose dust into a pressable crust. Get the crumbs fine and evenly moistened, and they settle into a firm base for all the creamy layers above. That’s the start of this No-Bake Peppermint Oreo Dessert Lasagna: a chocolate cookie crust, peppermint cream, chocolate pudding, and a cool whipped topping.
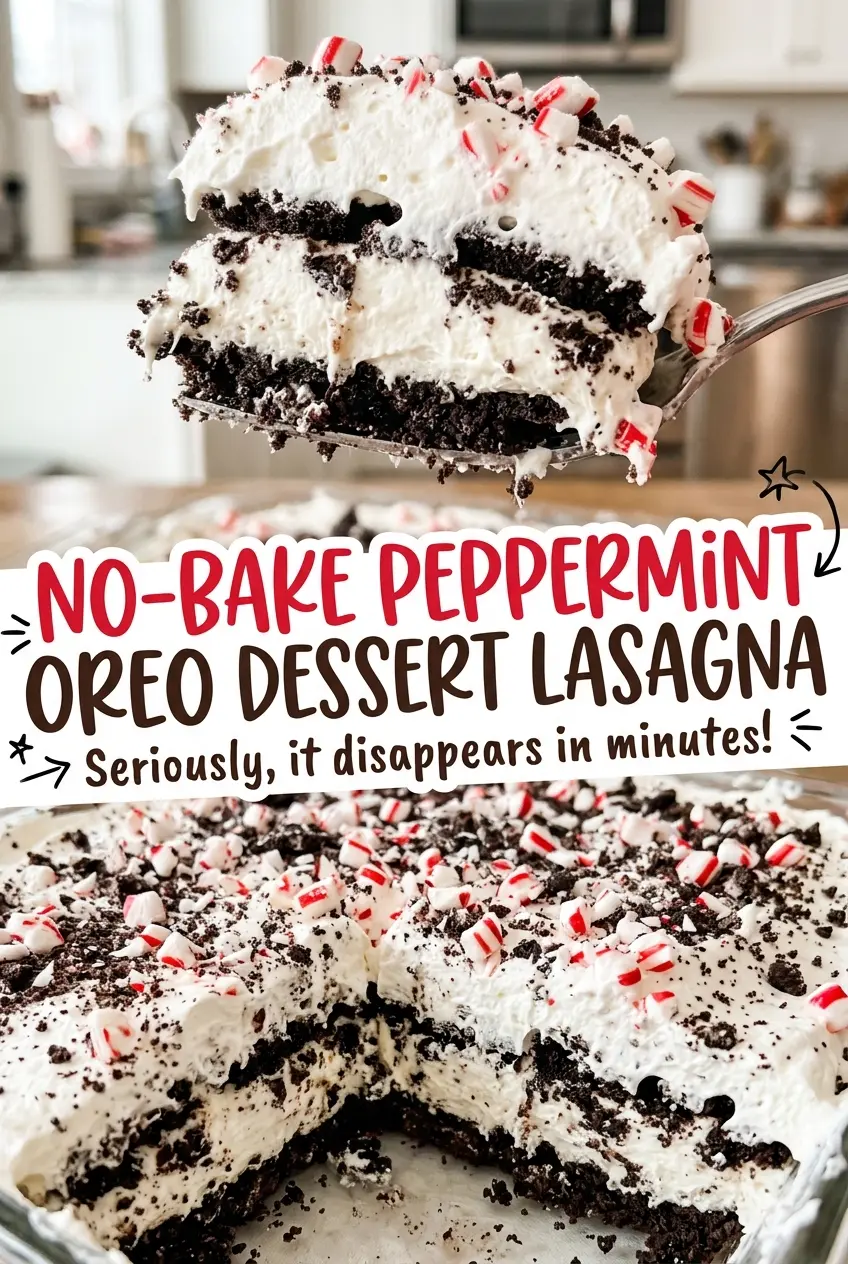
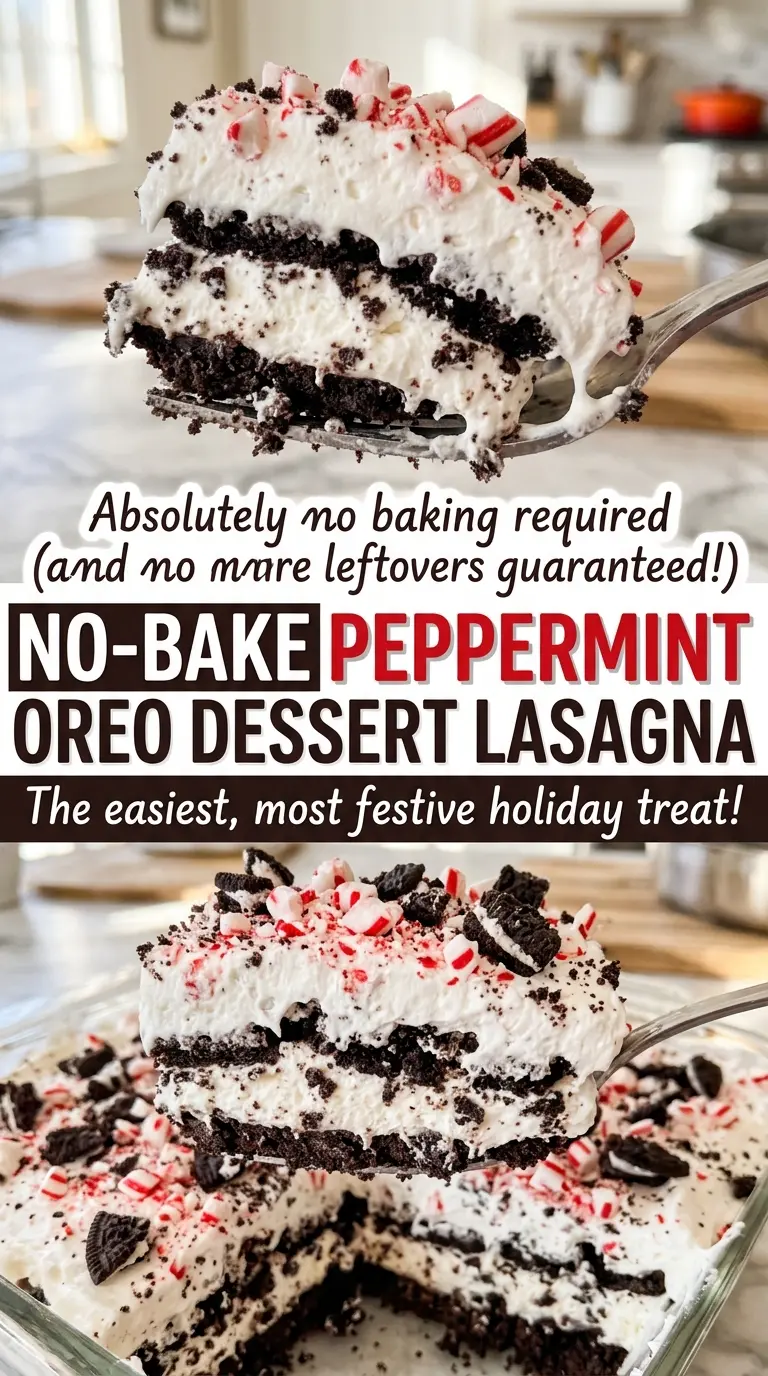
I like how each layer brings a different texture, so a slice feels rich without being one-note. The peppermint cream sits between the dark cookie crust and chocolate pudding, while crushed candy canes add a crisp finish. It’s an easy dessert to assemble without turning on the oven, but it needs enough refrigerator time to become firm enough to cut. Once chilled, the layers show up clearly in every slice.
Kitchen Note
Once the cream cheese mixture is smooth, fold the whipped topping in gently rather than stirring hard. That keeps the peppermint layer light and easy to spread without pressing down on the crust.
Save this No-Bake Peppermint Oreo Dessert Lasagna for its cool peppermint cream, chocolate pudding layers, and crisp candy cane finish.
Why the Layers Need Different Textures to Cut Cleanly
A dessert lasagna has to do more than stack flavors. Each layer needs a different job: the cookie base gives the slice structure, the peppermint cream softens the transition, and the pudding brings a smooth, cool center. If every layer had the same dense texture, the result would feel heavy and the separate layers wouldn’t stand out.
The balance here comes from contrast rather than extra ingredients. The chocolate crust is compact, while the cream layer is lighter and the pudding is soft but thick enough to sit above it. The final whipped topping keeps the upper edge airy. When the dish has time to chill, those textures settle into distinct bands instead of sliding together as you serve it. That’s what makes this particular no-bake dessert feel like a layered slice, not a bowl of pudding with crumbs.
What Gives Each Layer Its Peppermint-Oreo Character
- Oreo cookies — Their chocolate wafers and sweet filling make a flavorful crust with a fine crumb. A food processor is convenient, but a sealed bag and rolling pin work just as well. For a gluten-free version, use similarly sized gluten-free chocolate sandwich cookies; the cookie flavor may differ, but the crumb-and-butter base still works.
- Unsalted butter — Melted butter binds the crumbs so the base holds together after chilling. A lower-cost butter is fine here because it’s mixed into the cookies. Use unsalted butter so the crust doesn’t pick up extra salt.
- Cream cheese and powdered sugar — These make the peppermint layer creamy, tangy, and sweet. Let the cream cheese soften before beating so it blends smoothly. Full-fat cream cheese gives the layer its richest texture; a softer reduced-fat version may make it less firm.
- Peppermint extract — A small amount gives the cream layer its clear mint flavor. Extract strength varies by brand, so use peppermint extract rather than peppermint oil, which is more concentrated and can overwhelm the layer.
- Whipped topping — Its stable, airy texture lightens the cream cheese layer and makes a fluffy finish. The tubs can be an inexpensive store brand; consistency matters more than brand here. Homemade whipped cream isn’t a direct swap because it doesn’t hold the layers as reliably.
- Instant chocolate pudding and whole milk — The instant mix thickens without cooking, while whole milk gives the pudding a creamy texture. Stick with instant pudding rather than cook-and-serve, and use cold milk so the mixture thickens properly. A different brand of instant chocolate pudding is fine if you use the same package size.
- Peppermint candy canes — Crushed candy adds a bright mint accent and a crisp contrast to the soft layers. Break them into small pieces rather than leaving large shards, which are awkward to eat in a forkful.
Building the Layers Without Smearing Them Together
Pressing a Compact Oreo Base
Crush the cookies into fine crumbs in a food processor or inside a sealed bag with a rolling pin. Stir in the melted butter until the crumbs look evenly moistened, with no dry pockets. Press the mixture firmly over the bottom of a 9×13-inch baking dish, keeping the base level from edge to edge. Refrigerate it for 10 minutes so it can firm up before the cream layer goes on.
Making the Peppermint Cream
Beat the softened cream cheese and powdered sugar in a medium bowl until smooth, then beat in the peppermint extract. Fold in one tub of thawed whipped topping until the mixture is evenly combined. Spread it gently over the chilled crust, reaching the corners without digging into the crumb layer. If the cream cheese still has lumps, keep beating the cream cheese and sugar until smooth before adding the peppermint extract.
Thickening the Chocolate Pudding
Whisk both packages of instant chocolate pudding mix with the cold whole milk for 2 minutes. Let the bowl stand for 5 minutes, until the pudding has thickened. Spread it evenly across the peppermint cream, working carefully so the layers underneath stay in place. Don’t spread it while it’s still loose; a thicker pudding layer is easier to keep neat.
Finishing and Chilling the Dessert
Spread the remaining tub of whipped topping over the pudding in an even layer. Cover the dish and refrigerate it for at least 4 hours, until it’s firm enough to cut. Sprinkle the crushed peppermint candy canes over the top just before serving. Adding them at the end keeps their crunch from disappearing into the soft topping.
Easy Ways to Change the Peppermint Oreo Layers
Make the crust gluten-free
Replace the Oreo cookies with 36 similarly sized gluten-free chocolate sandwich cookies and keep the butter amount the same. The finished crust may have a slightly different chocolate flavor, but it still gives the dessert a firm cookie base.
Turn it into a chocolate-vanilla version
Use vanilla extract in place of the peppermint extract and finish with chocolate shavings instead of crushed candy canes. You’ll keep the chocolate pudding and cookie base, but the cream layer will taste mellow and vanilla-scented rather than minty.
Make-Ahead and Storage
- Make ahead: Assemble and refrigerate the covered dessert up to a day before serving; add the candy cane pieces just before it goes to the table.
- Refrigerator: Keep leftovers covered and refrigerate for up to 3 to 4 days. The cookie crust and whipped topping gradually soften, especially after the candy has been added.
- Freezer: Freeze without the candy cane topping, tightly covered, for up to 1 month. Thaw in the refrigerator; the pudding and whipped topping may be softer after freezing.
Questions That Come Up When Making This Dessert Lasagna
No-Bake Peppermint Oreo Dessert Lasagna
Ingredients
Equipment
Method
- Crush the Oreo cookies into fine crumbs in a food processor or in a sealed bag with a rolling pin.
- Stir the melted butter into the crumbs until evenly moistened.
- Press the mixture firmly over the bottom of a 9x13-inch baking dish.
- Refrigerate for 10 minutes.
- Beat the cream cheese and powdered sugar in a medium bowl until smooth.
- Beat in the peppermint extract.
- Fold in 1 tub of whipped topping.
- Spread the mixture evenly over the chilled crust.
- Whisk the pudding mixes with the cold milk for 2 minutes.
- Let stand for 5 minutes until thickened.
- Spread the pudding evenly over the peppermint cream layer.
- Spread the remaining tub of whipped topping evenly over the pudding.
- Cover the dish.
- Refrigerate for at least 4 hours, until firm enough to cut.
- Sprinkle with the crushed peppermint candy canes just before serving.