
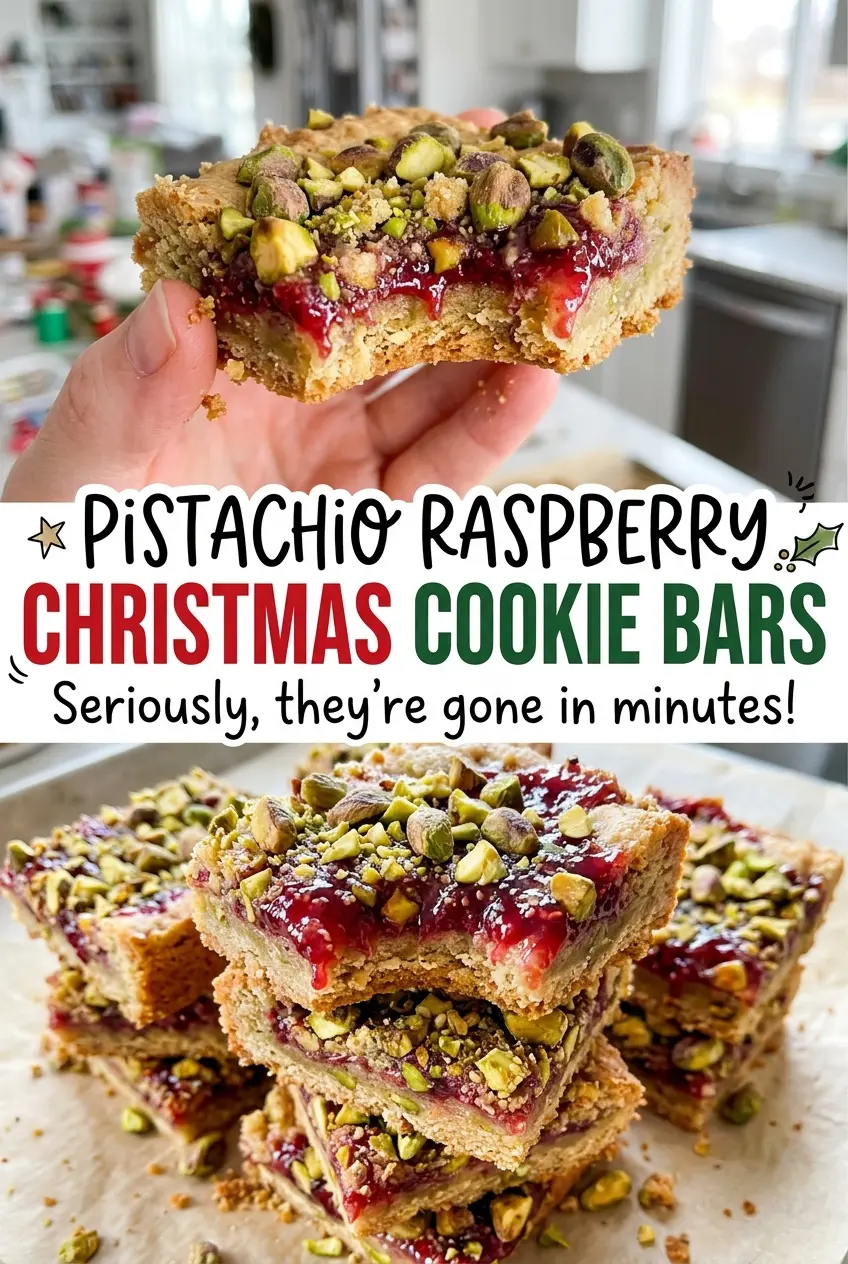
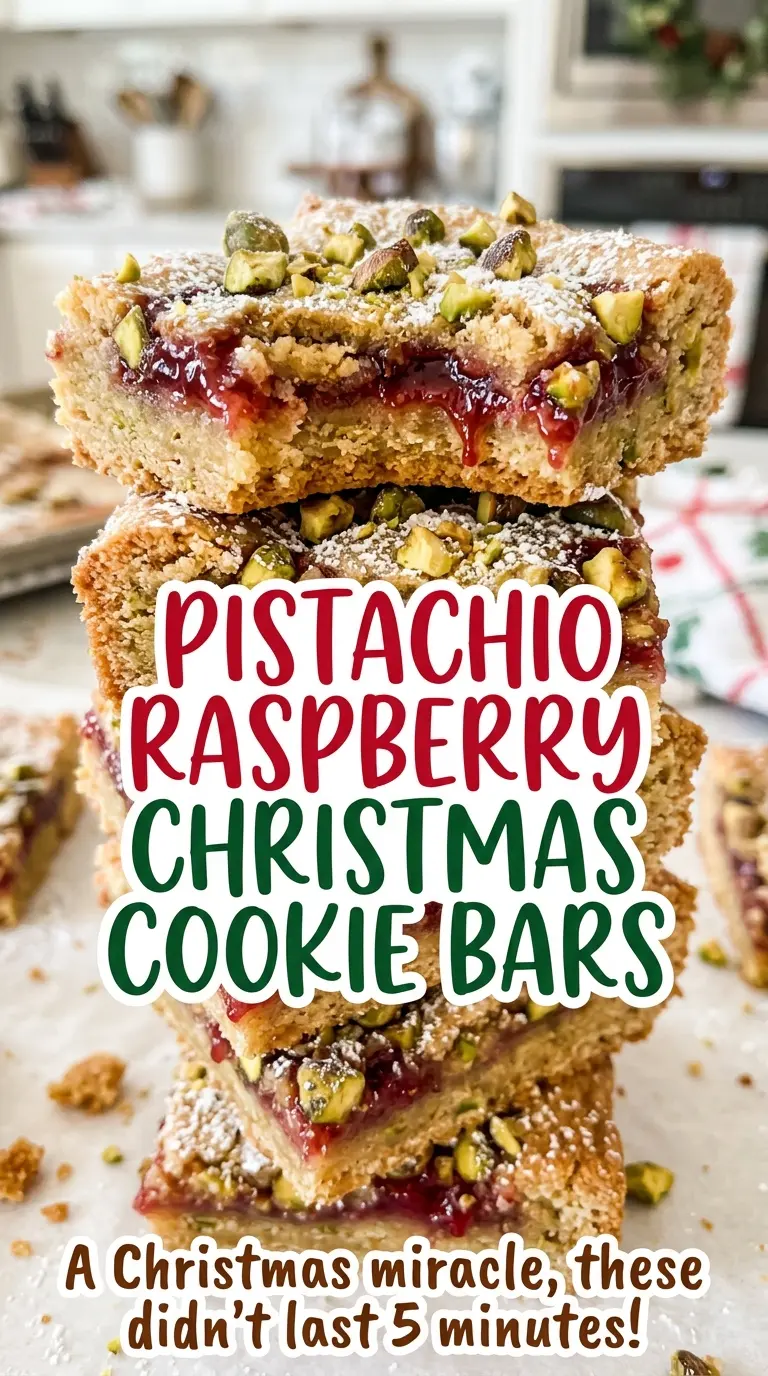
When the raspberry layer goes on, it’s easy to wonder whether the crumbly dough will hold together underneath it. Pressing most of the pistachio dough into the pan gives the preserves a sturdy shortbread base, while the rest stays loose enough to make a golden, nutty topping. These Pistachio Raspberry Christmas Cookie Bars have that lovely contrast: buttery and crisp at the edges, tender underneath, with a bright stripe of raspberry in the middle.
I like that the dough doesn’t need rolling or chilling before it goes into the pan. You mix it until it clumps, press part of it into an even layer, and scatter the rest over the preserves. Finely chopped pistachios run through both layers, so every square gets a little crunch. The bars are especially neat once they’ve cooled completely, when the jam has settled and the base cuts cleanly.
Kitchen Note
Chop the pistachios finely rather than leaving big pieces. They’ll distribute more evenly through the dough and make the top easier to cut into tidy bars.
Save these Pistachio Raspberry Christmas Cookie Bars for buttery shortbread, a bright raspberry center, and a crunchy pistachio finish.
Why These Bars Need a Shortbread Base, Not a Soft Cookie Crumb
These bars are built from a rich, low-moisture dough rather than a fluffy cookie batter. There’s no baking powder or baking soda to lift it, and the single egg yolk adds richness without making the dough wet or cakey. That combination gives you a compact base that can support the raspberry layer and a tender crumble on top.
That’s also why the dough is split unevenly. About two-thirds gets pressed into the pan to create a continuous floor; the remaining third is crumbled over the fruit, where it browns without sealing the preserves under another solid layer. If you press all the dough down, you lose that crumbly top. If the base is patchy, the jam can seep into the gaps and make the bottom softer. Press it evenly, but don’t pack it down harder than needed to cover the pan.
The raspberry layer brings a little tartness to a buttery cookie, but it also adds moisture. Seedless preserves spread smoothly and stay in a distinct stripe instead of leaving pieces of fruit in some bites and none in others. The result is a bar with clear layers, not a jam-filled cookie that falls apart when you pick it up.
What the Pistachios, Yolk, and Preserves Each Bring
- Butter — Softened unsalted butter creams with the sugar and gives the base its rich, tender bite. Let it soften enough to beat smoothly, but don’t melt it; melted butter makes a different, greasier dough. For a dairy-free version, use a firm dairy-free baking stick rather than soft tub spread.
- Egg yolk — The yolk helps bind the flour while keeping the dough rich and short. A whole egg adds extra white and moisture, so it isn’t a like-for-like swap here; stick with the yolk for the intended texture.
- All-purpose flour — It gives the dough its structure and keeps the bars sturdy enough to slice. For a gluten-free adaptation, use a cup-for-cup gluten-free flour blend in the same quantity; the bars may have a slightly more delicate crumb.
- Pistachios — Unsalted pistachios let the nutty flavor come through without adding extra salt. Buy shelled nuts to save prep time, and chop them finely so they’re easy to press into the dough. Finely chopped almonds work as a direct volume-for-volume swap, though the bars will taste less distinctly pistachio-forward.
- Seedless raspberry preserves — Preserves give the center a concentrated fruit flavor and a spreadable texture. A different seedless preserve, such as apricot, can replace them in the same quantity for a milder, sweeter fruit layer. Choose a thick preserve rather than a runny syrup so it stays between the cookie layers.
- Vanilla and sugar — Granulated sugar helps the edges brown while keeping the dough crisp, and vanilla rounds out the butter and pistachio. Regular granulated sugar is the right choice here; coarse sugar won’t dissolve as evenly in the short creaming time.
Build the Layers Before the Edges Turn Golden
Cream the Butter and Sugar
Heat the oven to 350°F and line a 9×13-inch metal baking pan with parchment, leaving overhang on two sides, then lightly grease the parchment. Beat the softened butter and sugar in a large bowl until creamy, about 2 minutes. Add the egg yolk and vanilla, beating until combined. If the butter is too cold, it may stay in small lumps instead of turning creamy, so give it more time to soften before you start.
Bring the Dough Together
Add the flour and fine salt, then mix on low just until the crumbly dough begins to clump. It won’t look like a smooth, stretchy dough; that’s expected for this shortbread-style base. Mix in three-quarters of the finely chopped pistachios, saving the rest for the top. Stop once the nuts are distributed so the dough stays tender.
Press, Spread, and Crumble
Press about two-thirds of the dough into an even layer across the prepared pan. Spread the seedless raspberry preserves over that base, covering it evenly. Crumble the remaining dough over the preserves without pressing it flat, then sprinkle on the reserved pistachios. Keep the topping in small, loose pieces so you get browned crumbles as well as fruit in each cut.
Bake Until the Crumble Is Lightly Browned
Bake for 35 to 40 minutes, until the edges are golden and the crumble is lightly browned. The center may still look softer than the edges because it sits over the preserves; judge the bake by the color of the crust rather than waiting for the fruit layer to look firm. If the top is still pale at 35 minutes, give it the remaining bake time and check again.
Cool Before Lifting and Slicing
Set the pan on a wire rack and let the bars cool completely in the pan, about 2 hours. The butter-rich base and warm preserves are fragile straight from the oven, so cutting early can drag the layers and break the bars. Once cool, use the parchment overhang to lift the slab out, then cut it into bars.
Easy Swaps for Pistachio Raspberry Cookie Bars
Make Them Gluten-Free
Replace the all-purpose flour with the same quantity of a cup-for-cup gluten-free flour blend. The shortbread base may feel a little more delicate, so let the bars cool completely before lifting and cutting.
Use Dairy-Free Baking Sticks
Swap the butter for the same amount of softened, firm dairy-free baking sticks. The bars will still hold together, though the base may be a little less buttery in flavor; avoid soft tub spreads, which contain more water and don’t cream the same way.
Trade Raspberry for Apricot
Use the same quantity of thick, seedless apricot preserves in place of raspberry. The fruit layer will be sweeter and less tart, while the buttery dough and pistachio topping stay just as they are.
Storage and Reheating
- Refrigerator: Store airtight for up to 1 week. The butter-rich base firms when cold, so let the bars come to room temperature before serving; they also keep airtight at room temperature for up to 3 days.
- Freezer: Freeze the cut bars in a single layer, then transfer them to an airtight container for up to 2 months. Thaw at room temperature before serving.
- Reheating: These bars are best at room temperature and don’t need reheating. Microwaving can make the preserves much hotter than the cookie around them.
Questions That Come Up Before You Bake These Bars
Pistachio Raspberry Christmas Cookie Bars
Ingredients
Equipment
Method
- Heat the oven to 350°F.
- Line a 9x13-inch metal baking pan with parchment paper, leaving overhang on two sides, and lightly grease the parchment.
- Beat the butter and sugar in a large bowl until creamy, about 2 minutes.
- Beat in the egg yolk and vanilla until combined.
- Add the flour and salt and mix on low until crumbly dough begins to clump.
- Mix in 3/4 cup of the pistachios.
- Press about two-thirds of the dough evenly into the prepared pan.
- Spread the raspberry preserves evenly over the dough.
- Crumble the remaining dough over the preserves and sprinkle with the remaining 1/4 cup pistachios.
- Bake for 35 to 40 minutes, until the edges are golden and the crumble is lightly browned.
- Cool completely in the pan on a wire rack, about 2 hours.
- Lift out using the parchment and cut into bars.