
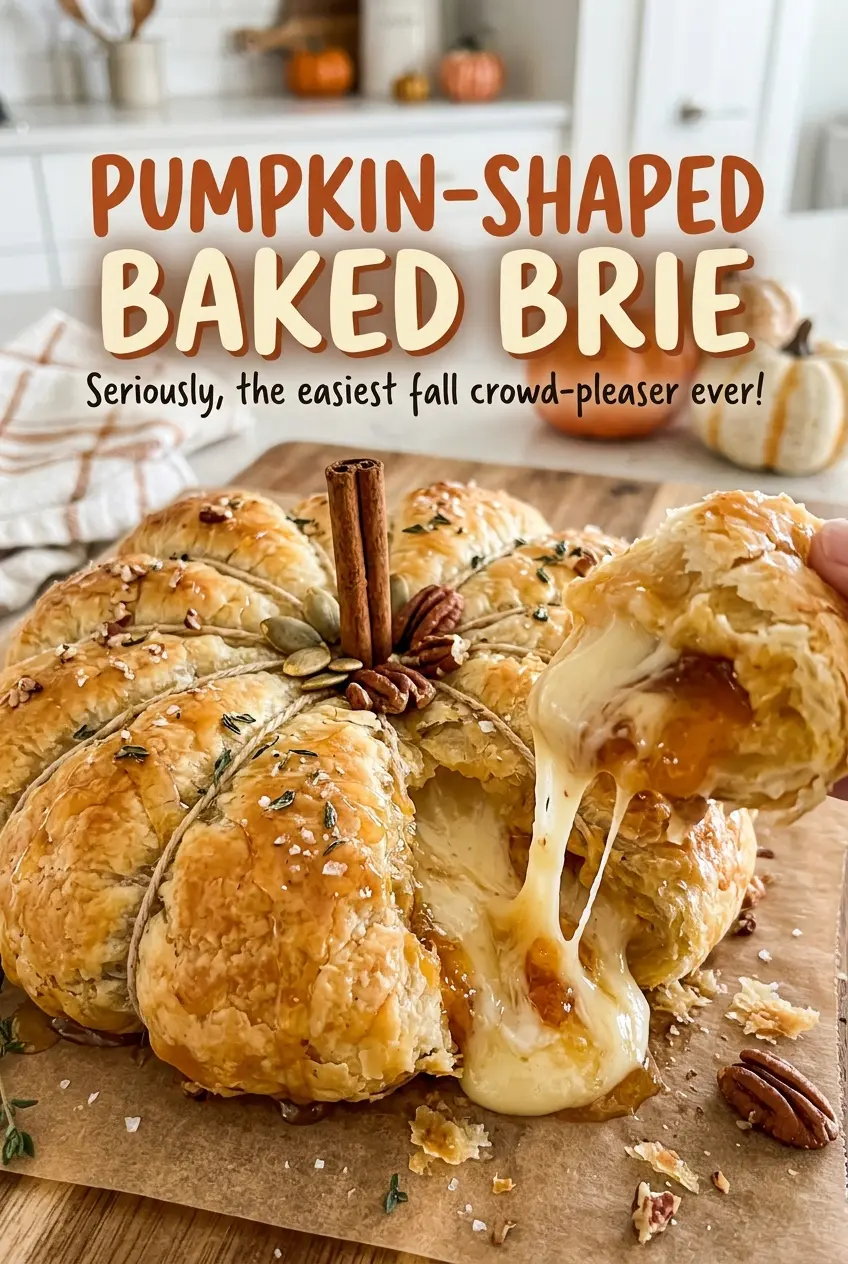
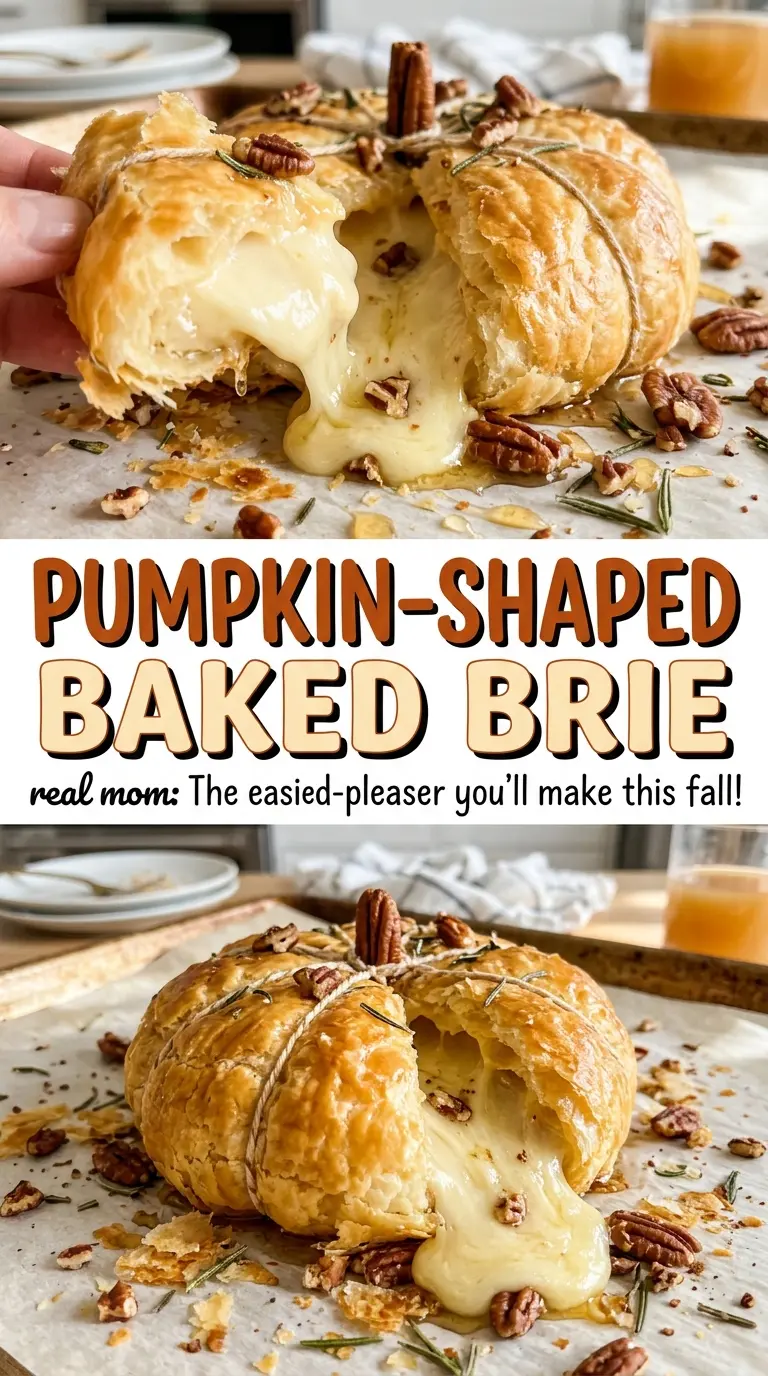
When this comes out of the oven, the twine has left eight clean ridges in the puff pastry, and the top looks unmistakably like a little pumpkin. I like that the shape comes from a simple bit of kitchen twine rather than any special pan or cutter. The wrapped Brie goes seam-side up, gets tied into sections, and bakes until the pastry is deep golden and puffed.
I keep the pastry thawed but cold while I work. It’s easier to roll and pleat when it’s flexible, but not warm and floppy, and the cold Brie is easier to wrap neatly. After a short rest, the cheese is soft enough to spoon onto crackers or slices of bread, while the pastry still gives you a crisp edge. One wheel makes eight servings, so this pumpkin-shaped baked Brie is an easy centerpiece to share.
Kitchen Note
Tie the twine snugly enough to define the pumpkin sections, but don’t pull until it bites into the pastry. If a strand cuts through the dough, melted Brie can escape through that weak spot.
Save this pumpkin-shaped baked Brie for a golden pastry centerpiece with eight twine-marked sections and a soft, melty center.
Why Cold Puff Pastry Makes the Pumpkin Shape Easier to Hold
Puff pastry is easiest to handle when it’s thawed enough to roll but still cold to the touch. If it gets warm, it turns soft and sticky, and the folds you need for wrapping Brie become harder to manage. Working on a lightly floured surface keeps the sheet from clinging while you roll it into a square; use only enough flour to keep it moving.
The shape also depends on how the pastry is gathered. Set the cold Brie in the middle, bring the pastry up around it, and pleat the extra dough rather than stretching it thin over the top. Pinch the gathered pastry closed, then use a small trimmed piece to make the stem. That gives the twine a stable center to sit around and keeps the top from becoming a loose, wide bundle. If the pastry starts to feel limp while you’re shaping it, pause and let it get cold and firm again before continuing. A neat wrap is easier to tie and gives the pumpkin a more defined outline after baking.
What the Brie, Puff Pastry, and Egg Wash Each Bring
- Puff pastry — Use a sheet that’s thawed but cold; that balance makes it pliable enough to roll and pleat without turning sticky. The pastry is the outer shell, so a sheet with cracks or dry edges is harder to seal neatly. Keep the package’s thawing guidance in mind, since brands can differ.
- Brie — A cold wheel is easier to center and wrap than one that’s already soft. The rind stays on inside the pastry, so there’s no trimming step before wrapping. A standard Brie wheel works well here; there’s no need to seek out a specialty variety.
- Egg — The beaten egg gives the pastry a glossy, deep-golden finish. Use a large egg as listed so the wash has the intended consistency when mixed with water. Brush the gathered top and stem as well as the main pastry surface, rather than leaving the decorative pieces dry.
- All-purpose flour — This is for dusting the work surface as you roll, not for mixing into the pastry. A light coating helps prevent sticking; excess flour can leave a dusty layer on the outside, so brush away what doesn’t cling before wrapping.
How to Tie the Pumpkin Ridges Without Cutting Through the Pastry
Roll and pleat the pastry around the Brie
Heat the oven to 400°F and line a rimmed baking sheet with parchment paper. Roll the cold puff pastry on a lightly floured surface into a 10-inch square, then center the cold Brie on top. Gather the pastry over the cheese, pleating it as you go, and pinch the dough closed at the top. Trim off a small piece of excess pastry for the stem, keeping the rest of the closure intact.
Mark eight sections with kitchen twine
Lay four 24-inch lengths of food-safe kitchen twine in a star pattern on the counter. Put the wrapped Brie seam-side up in the center, then bring opposite ends of twine over the top and tie them snugly. The strands should mark eight sections without slicing into the pastry. Transfer the tied Brie to the parchment-lined baking sheet before adding the egg wash.
Brush the top and attach the stem
Beat the egg with the water until evenly combined. Brush the pastry surface with the egg wash, taking care to coat the gathered top where the folds meet. Press the trimmed pastry piece onto the gathered area to form the stem, then brush the stem too so it browns along with the rest. If the stem feels loose, press it gently into the pastry rather than pulling at the wrapped dough.
Bake until the pastry is deeply golden
Bake for 25–30 minutes, watching for puffed pastry with a deep golden-brown surface. Pale pastry needs the full bake to develop its color, so don’t take it out just because the ridges have appeared. Rest the Brie for 10 minutes after baking; the cheese will still be soft, and the pastry will be easier to handle. Carefully remove the twine before serving, lifting each strand away rather than dragging it across the crust.
Two Ways to Change the Shape or Adapt the Pastry
Make a gluten-free pumpkin Brie
Use one sheet of gluten-free puff pastry in place of the regular pastry and gluten-free flour for rolling instead of all-purpose flour. Keep the Brie, egg, and water the same. Gluten-free pastry can be more fragile to pleat, so work gently and press the gathered seam closed; the final crust may have a slightly different texture.
Skip the ridges for a simple round Brie
Wrap and pinch the pastry around the Brie, but leave off the twine and pastry stem for a plainer parcel. Brush it with the egg wash and use the same baking temperature and timing, looking for puffed, deep-golden pastry. You’ll lose the pumpkin outline, but the Brie stays tucked inside the pastry.
Storage and Reheating
- Refrigerator: Store leftovers covered in the refrigerator for up to 3 days. The pastry will soften as it sits, even though the Brie remains good to eat.
- Freezer: I don’t recommend freezing the baked Brie. The pastry loses its crisp texture and the cheese can turn grainy after thawing.
- Reheating: Warm leftovers in the oven until the pastry feels crisp again and the center is soft. Skip the microwave; it warms the Brie quickly but leaves the puff pastry limp.
Questions That Come Up Before the Brie Goes in the Oven
Pumpkin-Shaped Baked Brie
Ingredients
Equipment
Method
- Heat the oven to 400°F.
- Line a rimmed baking sheet with parchment paper.
- On a lightly floured surface, roll the puff pastry into a 10-inch square.
- Set the Brie in the center of the pastry.
- Gather and pleat the pastry over the top, then pinch it closed.
- Trim off a small piece of excess pastry to shape into a stem.
- Lay four 24-inch lengths of food-safe kitchen twine in a star pattern on the counter.
- Set the wrapped Brie seam-side up at the center of the twine.
- Bring opposite ends of twine over the top and tie them snugly to mark eight sections without cutting through the pastry.
- Transfer the Brie to the prepared baking sheet.
- Beat the egg with the water.
- Brush the pastry with egg wash.
- Press the pastry stem onto the gathered top.
- Brush the stem with egg wash.
- Bake for 25–30 minutes, until the pastry is puffed and deep golden brown.
- Rest for 10 minutes, then carefully remove the twine before serving.