
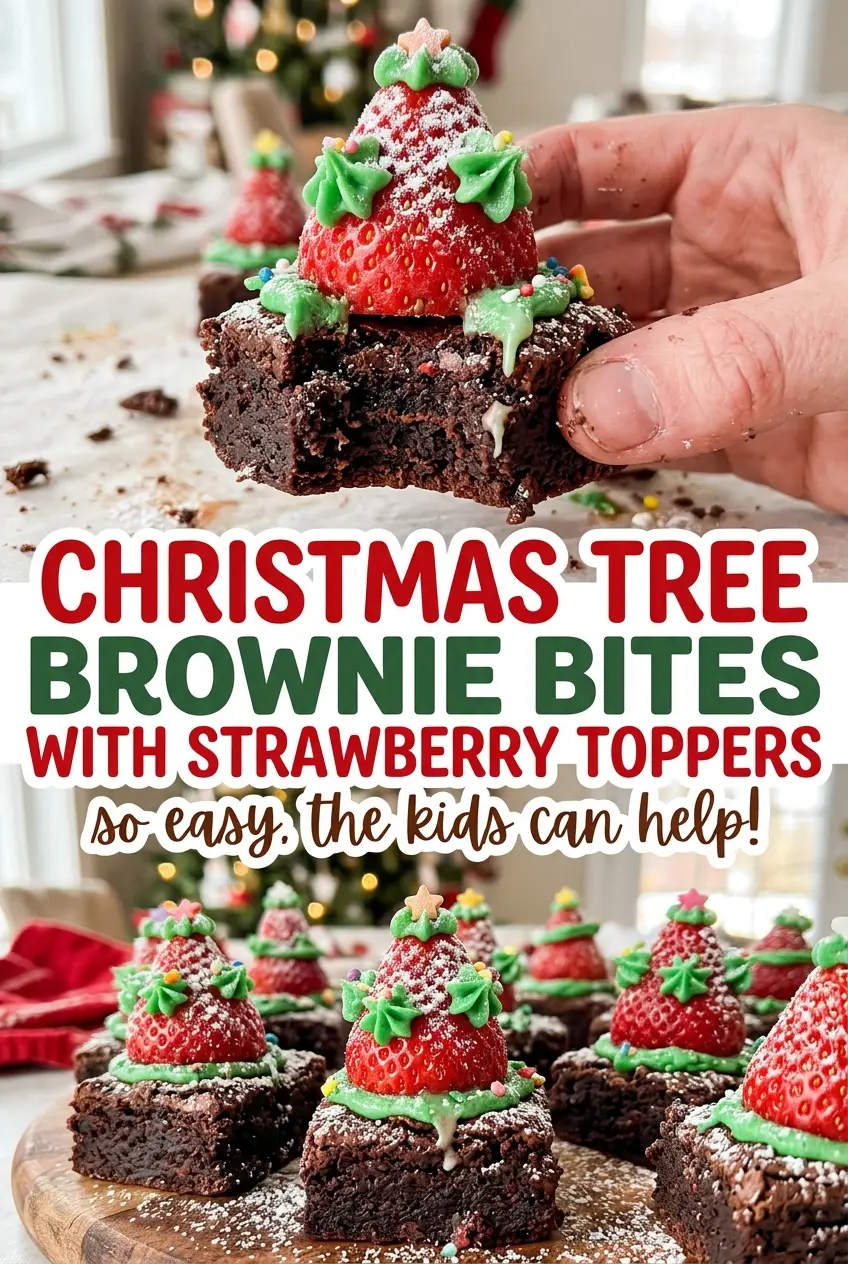
The brownies come out of the oven with set edges and a center that still gives a few moist crumbs on a toothpick. That’s the moment to stop baking: the squares stay fudgy enough to support their strawberry toppers without turning cakey. I cut the cooled slab into 24 pieces, then build each Christmas Tree Brownie Bite with a strawberry and a little green buttercream.
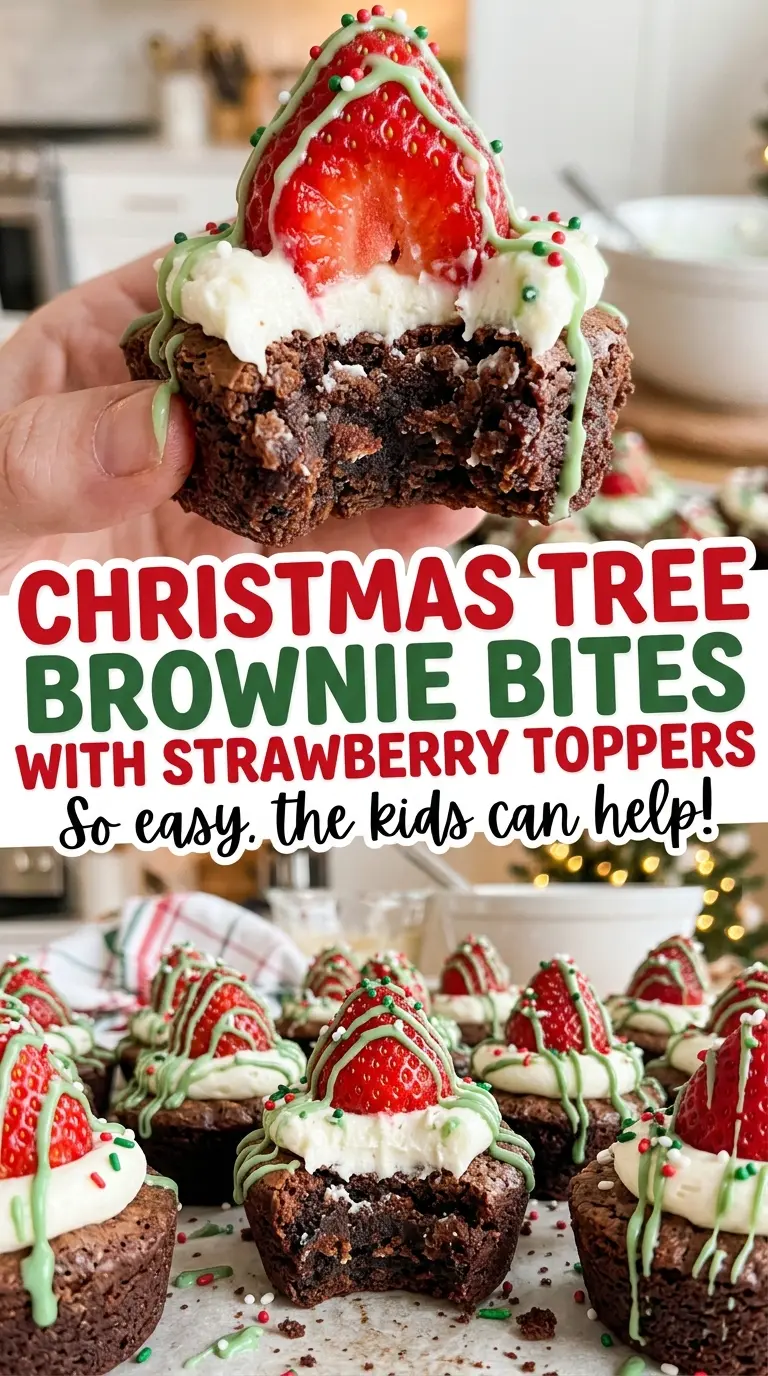
The trick to making these look like tiny trees is to treat the strawberry and brownie as separate parts that need a secure connection. A dab of frosting holds the berry in place, and piped stars cover it from the bottom up. Once the frosting sets in the refrigerator, each bite is easy to pick up, with a soft brownie underneath and a fresh berry at the center.
Kitchen Note
Trim only a thin slice from the broad end of each strawberry. A flat base helps the berry stand upright, while cutting off too much leaves less height to decorate.
Save these Christmas Tree Brownie Bites with Strawberry Toppers for a festive treat with fudgy brownie squares, fresh berries, and piped green buttercream.
Why the Strawberry Needs Its Own Anchor on the Brownie
A berry perched directly on a brownie square can slide when you add the frosting. The small dab of buttercream under each strawberry gives it a sticky landing spot, so it stays upright while you pipe the rest of the decoration. It’s a small step, but it makes the difference between a neat little tree and a berry that tips sideways as soon as you start decorating.
The frosting also does two jobs: it holds the topper in place and becomes the tree-shaped coating. Starting at the bottom and piping overlapping stars upward covers the red berry while leaving its pointed tip as the tree’s peak. Use a small open-star tip so the frosting has definition; a large tip can cover the strawberry too quickly and make it harder to build the same layered look. Keep the brownies cut into even squares, too, so each one gives the topper a steady, similar-sized base.
These are assembled individually rather than frosted as a pan of brownies. That lets you control the shape on each bite, and the final refrigerator chill helps the piped frosting hold its ridges.
What Gives These Bites a Fudgy Base and Pipeable Trees
- Vegetable oil and granulated sugar — Oil keeps the brownie crumb tender, while sugar adds sweetness and helps the top bake into a delicate surface. A neutral vegetable oil is a good choice here; strongly flavored oils would compete with the cocoa.
- Eggs and vanilla — Eggs give the batter structure and help the squares hold their shape under the toppings. Use large eggs, and add them one at a time so they whisk evenly into the oil and sugar. Vanilla rounds out the cocoa without taking over.
- All-purpose flour and cocoa powder — Flour gives the brownies enough structure to cut into squares, while unsweetened cocoa brings the chocolate flavor. Measure the flour without packing it down; too much can make the finished bites dry and crumbly. For a gluten-free batch, use a cup-for-cup gluten-free baking blend intended to replace all-purpose flour.
- Medium strawberries — Choose berries that are firm and similar in size so the toppers sit neatly on the brownie squares. Rinse them and dry them thoroughly before decorating; lingering water makes the frosting harder to keep in place. Fresh berries work best for the shape and texture here.
- Butter, powdered sugar, and milk — Softened butter gives the frosting its creamy base, powdered sugar thickens it, and milk loosens it to a pipeable consistency. Powdered sugar that’s free of hard lumps blends more smoothly. Add the milk with the coloring so the frosting can be beaten until fluffy.
- Green gel food coloring and star-shaped sprinkles — Gel coloring gives the buttercream its green shade without adding much liquid, which helps it stay pipeable. The small stars finish each tree at the pointed tip; choose sprinkles small enough to sit neatly on top.
From Fudgy Brownie Slab to Strawberry Trees
Whisk the Brownie Batter
Heat the oven to 350°F and line a 9×13-inch pan with parchment, leaving an overhang on two sides. Whisk the vegetable oil and granulated sugar in a large bowl, then whisk in the eggs one at a time and the vanilla. In a separate bowl, whisk together the flour, cocoa powder, and salt. Fold the dry mixture into the wet ingredients just until no dry streaks remain, then spread the batter evenly in the pan.
Bake, Cool, and Cut the Squares
Bake for 25 to 30 minutes, until the edges are set and a toothpick inserted in the center comes out with a few moist crumbs. A completely clean toothpick means the brownies have gone farther than needed for a fudgy bite. Let the pan cool completely, about 1 hour, before lifting the brownie slab out by the parchment overhang. Cut it into 24 squares once it’s cool; warm brownies are more likely to smear or break.
Make the Green Buttercream
Beat the softened butter in a bowl until creamy. Gradually beat in the powdered sugar, then beat in the milk and green gel food coloring. Keep beating until the frosting looks fluffy and holds its shape when lifted; if it’s still slack, the piped stars won’t keep their edges. Transfer the frosting to a piping bag fitted with a small open-star tip.
Set the Strawberries and Pipe the Trees
Rinse and thoroughly dry the strawberries, remove the leaves and hulls, and trim a thin slice from each broad end. Spread a small dab of frosting on each brownie square, then set a strawberry flat-side down with its pointed end up. Pipe overlapping stars from the base of each berry to its tip, and finish each one with a star-shaped sprinkle. Refrigerate the bites for 20 minutes to set the frosting, then keep them chilled until serving.
Easy Ways to Adapt the Brownies and Toppers
Make the Brownies Gluten-Free
Replace the all-purpose flour with a cup-for-cup gluten-free baking blend made for baking. The brownies may have a slightly different crumb, so let the slab cool completely before cutting and topping it.
Make the Toppers Dairy-Free
Use stick-style dairy-free butter in place of the butter and unsweetened plant milk in place of the milk, keeping the same amounts. The brownie batter already uses oil rather than butter. The frosting may feel a little softer, so chill the decorated bites until the piping is set.
Leave the Frosting White
For a simpler red-and-white look, omit the green gel food coloring and pipe the buttercream as usual. The strawberries remain visible between the white stars, and the brownie-and-berry combination stays the same.
Chilling and Serving
- Refrigerator: Keep the finished bites chilled until serving and serve them the same day. The frosting will feel firmer straight from the refrigerator.
- Freezer: Freezing the assembled bites isn’t a good fit; strawberries soften as they thaw, and the piped frosting can lose its defined shape.
- Serving: Serve the bites chilled after the frosting has set. Don’t leave the finished strawberry-topped bites out for extended storage.
Questions That Come Up While Making These Brownie Bites
Christmas Tree Brownie Bites with Strawberry Toppers
Ingredients
Equipment
Method
- Heat the oven to 350°F and line a 9x13-inch baking pan with parchment paper, leaving an overhang on two sides.
- Whisk the oil and granulated sugar in a large bowl, then whisk in the eggs one at a time and the vanilla.
- Whisk the flour, cocoa powder, and salt in a medium bowl, add to the wet ingredients, and fold just until no dry streaks remain; spread the batter evenly in the pan.
- Bake for 25 to 30 minutes, until the edges are set and a toothpick inserted in the center comes out with a few moist crumbs.
- Cool completely in the pan, about 1 hour, then lift out using the parchment and cut into 24 squares.
- Rinse and thoroughly dry the strawberries, remove the leaves and hulls, then trim a thin slice from the broad end of each to make a flat base.
- Beat the softened butter in a bowl until creamy, then gradually beat in the powdered sugar; beat in the milk and green food coloring until fluffy and pipeable.
- Spread a small dab of frosting on each brownie square and set a strawberry flat-side down on it, pointed end up.
- Transfer the remaining frosting to a piping bag fitted with a small open-star tip and pipe overlapping stars from the base of each strawberry to the tip; finish each with a star-shaped sprinkle.
- Refrigerate for 20 minutes to set the frosting. Keep chilled until serving and serve the same day.