
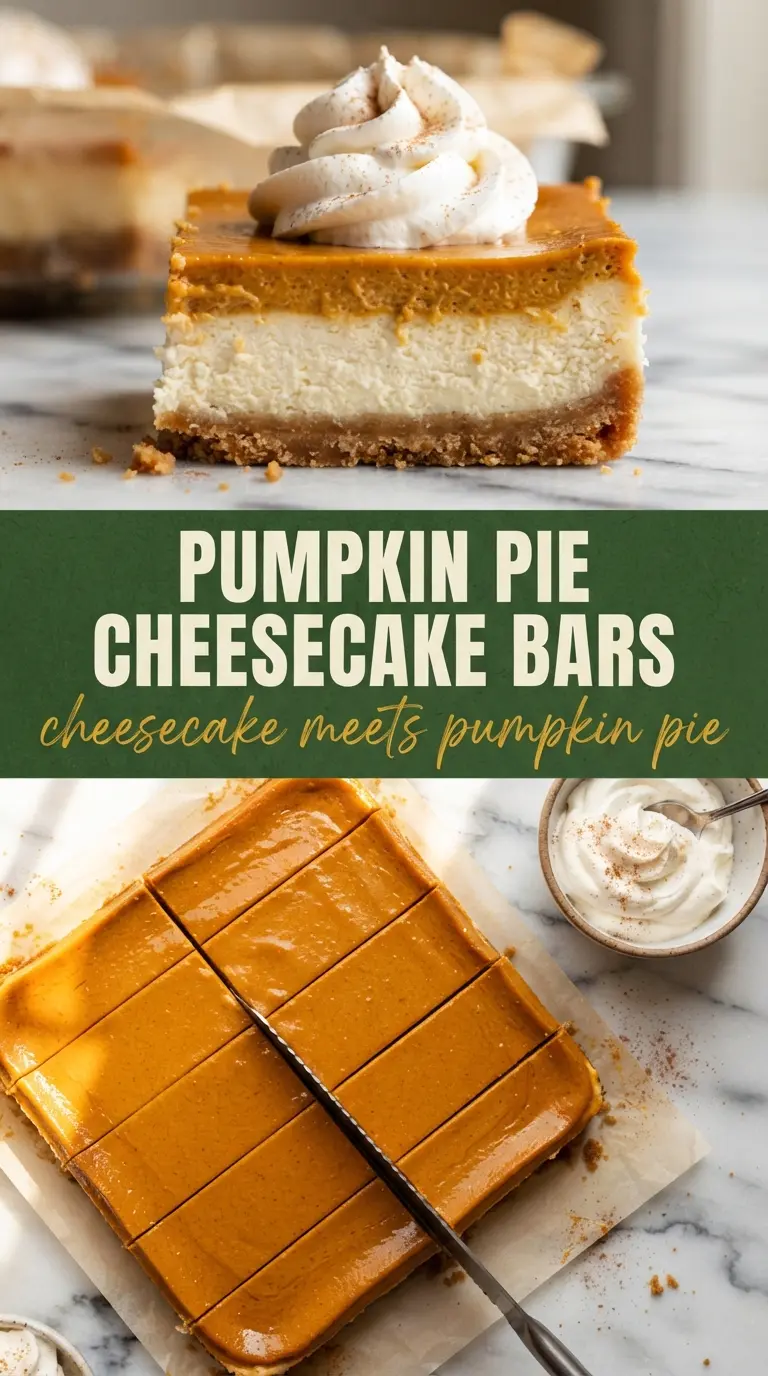
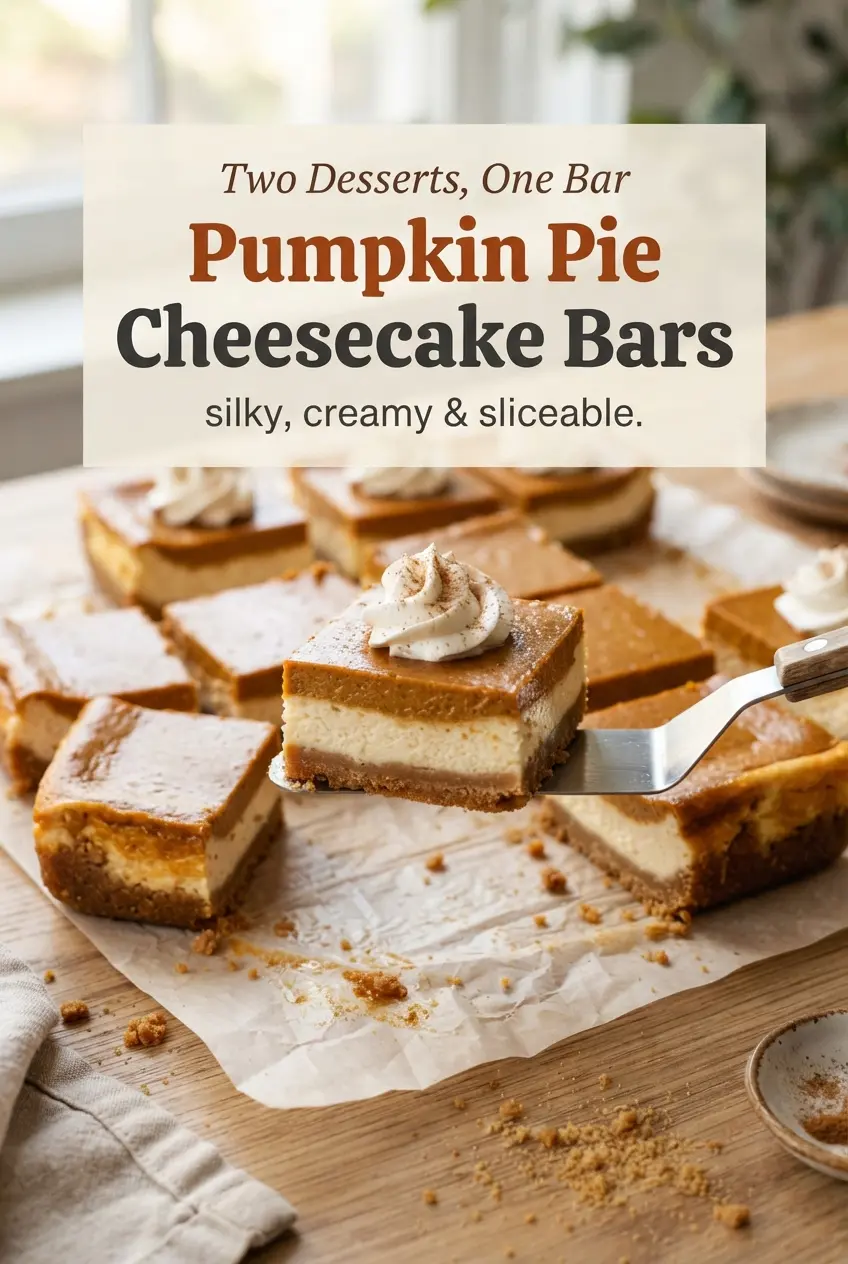
Layered pumpkin pie cheesecake bars hit that sweet spot between creamy and clean-cut: a crisp graham crust on the bottom, a tangy vanilla cheesecake middle, and a softly spiced pumpkin layer that sets up into neat bars you can actually serve without a battle. Each bite gives you the best part of two desserts at once, with enough structure to hold its shape after chilling.
What makes this version work is the order of the layers and the temperature of the filling. The crust gets a short bake first, which keeps it from turning soggy under the custard layers. The cheesecake base stays light because the egg is mixed in just until combined, and the pumpkin layer uses cream for a silkier texture than pumpkin pie filling alone usually gives. Bake it until the center still has a small jiggle; carryover heat finishes the set as it cools.
You’ll find a few practical tips below for getting clean layers, cutting sharp bars, and making them ahead for a crowd. There’s also a note on the one substitution that works best if you need a gluten-free crust.
The layers baked up clean and the pumpkin stayed silky instead of watery. I chilled them overnight, and they sliced into perfect bars without cracking.
Save these layered pumpkin pie cheesecake bars for the dessert table when you want clean slices and two classic flavors in one pan.
The Cleanest Way to Keep the Layers Distinct
The biggest risk with layered bars is muddying the cheesecake and pumpkin into one thick, beige filling. That happens when the base is too loose, the top layer is poured too fast, or the batter gets overmixed and loses body. This recipe avoids all three by baking the crust first, spreading the cheesecake on a warm but stable base, and adding the pumpkin layer slowly so it settles instead of burrowing through the cream cheese.
The other thing that matters here is doneness. The bars should not look firm in the middle when they come out of the oven. They need a slight wobble in the center so the custard layers stay smooth after chilling instead of drying out into a dense, cracked slab. If the edges are puffed and the middle still trembles like set gelatin when you nudge the pan, you’re in the right range.
What Each Layer Is Doing in This Pan
- Graham cracker crumbs — These give the crust its sandy, toasty base. Fresh crumbs hold together better than stale boxes that have been open for months, but the store-bought kind works fine as long as they’re finely crushed.
- Melted butter — Butter is what turns the crumbs from loose grit into a crust that slices cleanly. If the mixture looks dry after stirring, it won’t compact well, so add the butter fully and press the crust firmly into the pan.
- Cream cheese — This is the backbone of the middle layer, and it has to be softened. Cold cream cheese leaves tiny lumps that don’t disappear later, even after baking. Full-fat blocks give the smoothest, richest result.
- Pumpkin purée — Use pure pumpkin, not pumpkin pie filling. Pie filling already has sugar and spices mixed in, which throws off the texture and makes the top layer too sweet.
- Heavy cream — This loosens the pumpkin mixture just enough to keep it silky. Half-and-half can work in a pinch, but the bars won’t taste as plush.
- Pumpkin pie spice — This gives the top layer its warm finish without needing a long spice list. If yours is old and dull, the bars will taste flat, so check that it still smells fragrant before you start.
Building the Custard Layers Without Disturbing the Crust
Pressing and Pre-Baking the Crust
Mix the crumbs, sugar, and melted butter until every bit looks evenly moistened, then press the mixture into the pan with real pressure. An even layer matters more than a thick one. Bake it for the full 10 minutes so the butter sets and the crust can support the filling without turning pasty underneath.
Spreading the Cheesecake Base
Beat the cream cheese and sugar until the mixture turns smooth and fluffy, then add the egg and vanilla just until combined. If you keep beating after the egg goes in, the filling can puff too much and crack as it cools. Spread it over the warm crust gently so you don’t dig up the crumbs.
Pouring the Pumpkin Layer Slowly
Whisk the pumpkin mixture until it’s smooth and pour it over the back of a spoon or in a thin stream across the pan. That slower pour keeps the top layer from breaking through the cheesecake layer below it. Use a spatula to guide it to the corners, but don’t stir or swirl unless you want the layers to blur together.
Baking Until the Center Still Wobbles
Bake until the edges are set and the center still has a small jiggle when you nudge the pan. If the whole surface is firm in the oven, it’s already overbaked. Pull it out, cool it completely, then refrigerate until cold enough to slice cleanly; warm bars always look messy no matter how sharp the knife is.
How to Adapt These Bars for Different Needs
Gluten-Free Crust Swap
Use gluten-free graham-style crumbs in the same amount. The filling doesn’t need any changes, and the bars still cut neatly, but the crust may be a little more delicate, so press it especially firmly into the pan.
Dairy-Free Version
Use dairy-free cream cheese and a plant-based butter substitute. The bars will still set, but the cheesecake layer won’t taste quite as rich, so chill them fully before slicing to help them hold together.
Making Them a Day Ahead
These bars are at their best after an overnight chill. The layers firm up, the spice settles in, and the slices come out with clean edges instead of soft corners.
Storage and Reheating
- Refrigerator: Store covered for up to 5 days. The crust softens a little over time, but the bars stay pleasantly sliceable.
- Freezer: They freeze well. Wrap individual bars tightly and freeze for up to 2 months, then thaw overnight in the refrigerator.
- Reheating: These are best served cold or cool, not warmed. Reheating softens the cheesecake layer and makes the crust lose its clean bite.
Answers to the Questions Worth Asking
Layered Pumpkin Pie Cheesecake Bars
Ingredients
Equipment
Method
- Preheat the oven to 350°F (175°C). Line a 9x13-inch baking pan with parchment paper, leaving an overhang on the long sides.
- Stir together graham cracker crumbs, granulated sugar, and melted unsalted butter, then press firmly into the bottom of the pan.
- Bake the crust for 10 minutes, then set aside and reduce the oven to 325°F (165°C) while you make the layers.
- Beat the cream cheese and granulated sugar until smooth, then beat in the egg and vanilla just until combined.
- Spread the cheesecake mixture evenly over the warm crust.
- Whisk the pumpkin purée, light brown sugar, eggs, heavy cream, pumpkin pie spice, and salt until smooth.
- Pour the pumpkin mixture slowly over the cheesecake layer and gently spread it to the edges.
- Bake for 40–45 minutes, until the edges are set and the center has only a slight jiggle (do not overbake).
- Cool completely at room temperature.
- Refrigerate for at least 4 hours or overnight until fully set.
- Lift out using the parchment overhang and cut into bars with a sharp knife, wiping it clean between cuts.
- Top each bar with whipped cream and a pinch of cinnamon before serving.