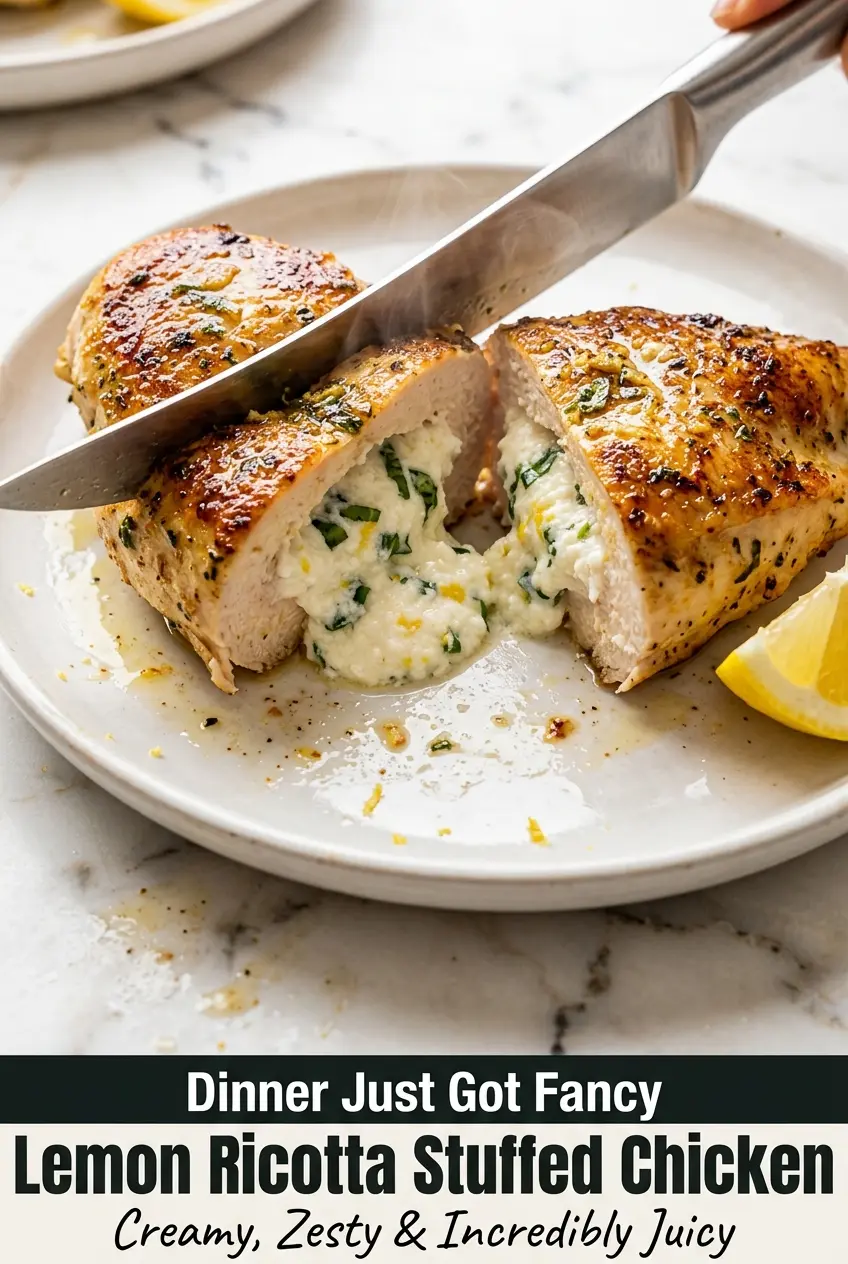
Juicy chicken wrapped around a creamy ricotta center is the kind of dinner that looks restaurant-worthy the second it hits the plate. The lemon zest keeps the filling bright instead of heavy, and the seared crust gives you just enough savory contrast to make every slice worth serving. When the chicken stays tender and the filling stays soft, you get clean slices with a molten, herb-flecked middle that feels far more polished than the effort suggests.
The part that makes this version work is balance. Whole milk ricotta gives the filling body without turning grainy, Parmesan adds salt and depth, and the lemon juice plus zest keep the cheese mixture from tasting flat. The chicken also gets seasoned on the outside before it’s stuffed, which means every bite has flavor on the surface, not just in the center.
Below, I’ve included the pocket-cutting trick that keeps the filling inside, the sear that builds color before the oven finishes the job, and a few swaps for when you need to work with what’s in the fridge.
The ricotta stayed creamy and never leaked out, and the lemon zest kept the filling from tasting heavy. I seared it for four minutes per side and the chicken came out juicy with a golden crust.
Save this lemon ricotta stuffed chicken breast for a dinner that slices beautifully and tastes bright, creamy, and elegant without extra work.
The Pocket Cut That Keeps the Ricotta Inside
Stuffed chicken fails when the pocket is cut too thin, too shallow, or straight through the breast. You want a deep horizontal pocket with an intact bottom and far side so the filling has somewhere to sit without escaping into the pan. If the opening tears, the ricotta leaks out before the chicken finishes cooking, and you lose both moisture and presentation.
The other problem is overfilling. Ricotta expands a little as it heats, and the cheese mixture needs a little room to settle. Press the opening closed with your fingers and use toothpicks only if the breast won’t stay sealed on its own. The goal is a neat stuffed shape that can survive the sear without the filling breaking through the crust.
- Cut with confidence, not depth. Start at the thickest side and stop before you reach the opposite edge.
- Season the outside first. The spice blend builds flavor on the surface, where the sear can actually work.
- Use a filling that holds. Whole milk ricotta is thick enough to mound, while part-skim versions can turn looser and a little wetter.
- Rest before slicing. If you cut too soon, the filling runs before it sets.
What Each Ingredient Is Doing in This Dish
- Whole milk ricotta — This is the creamy base of the filling, and it’s worth using the full-fat version. Part-skim ricotta can work, but it’s usually looser and a little less rich. If your ricotta looks watery, drain it in a fine mesh strainer for 15 to 20 minutes before mixing.
- Parmesan — Parmesan adds salt, structure, and a sharper finish that keeps the filling from tasting bland. Freshly grated melts and blends best. The pre-grated shaker stuff won’t disappear as smoothly into the mixture.
- Lemon zest and juice — Zest gives the filling the bright citrus aroma; juice adds a little acidity. Use both. If you only add juice, the filling can taste thin and sour instead of fresh and rounded.
- Fresh basil and parsley — These herbs keep the filling green and lively. Dried herbs won’t give you the same clean finish here, so fresh is the right call if you can get it. Chop them finely so they distribute through the cheese instead of clumping.
- Chicken breasts — Large, evenly sized breasts are easier to stuff and cook at the same pace. If one breast is much thicker than the others, pound it lightly before cutting the pocket so the oven time lines up.
How to Get a Golden Sear Before the Oven Finishes the Job
Mix the filling until it holds together
Stir the ricotta, Parmesan, lemon, garlic, herbs, salt, pepper, and red pepper flakes until the mixture looks smooth and cohesive. It should spoon cleanly without looking soupy. If the filling seems loose, the chicken was probably holding extra moisture or the ricotta needed draining. A thicker filling stays put when the chicken hits the pan.
Build the pocket and season the outside
Pat the chicken dry first so the surface can brown instead of steam. Slice a pocket into the thick side of each breast, then season both sides generously with the spice blend. Dry chicken plus dry seasoning gives you a better crust; damp chicken gives you gray spots and weak color.
Stuff, seal, and sear
Spoon the filling into each breast and press the opening closed. Use just enough toothpicks to keep the seam from opening during the sear. Heat the oil until it shimmers, then lay the chicken in the pan and leave it alone long enough to build color. If you move it too early, the surface sticks and tears before the crust sets.
Finish in the oven without overcooking
Transfer the skillet to the oven or move the chicken to a baking dish and bake until the thickest part reaches 165°F. That temperature matters because stuffed chicken can look done on the outside while still needing a few more minutes in the center. Let it rest for 5 minutes before slicing so the juices settle and the cheese filling stays in place.
How to Adapt This for What’s in Your Kitchen
Make it gluten-free without changing the texture
This recipe is naturally gluten-free as written, so you don’t need a special swap. Just check that your seasoning blends and Parmesan are not carrying hidden additives. The chicken still browns the same way and the filling stays creamy.
Dairy-free version that keeps the stuffing moist
Use a dairy-free ricotta-style cheese and swap in a dairy-free Parmesan alternative if you have one that melts well. The filling will be a little softer and less tangy, so add an extra pinch of salt and a little more lemon zest to wake it up. Drain any loose liquid before stuffing.
Swap the herbs based on what’s fresh
Basil and parsley are the cleanest match, but dill, chives, or tarragon can work if that’s what you have. Dill gives it a sharper, almost springlike edge; tarragon makes the filling taste more elegant and slightly anise-like. Keep the total herb amount about the same so the cheese still stays front and center.
Use chicken cutlets when breasts are too thick to stuff cleanly
If the breasts are awkwardly large or uneven, pound them into thinner cutlets and roll them around the filling instead of cutting a pocket. The texture changes a little — you get more swirl than center pocket — but it cooks faster and can be easier to seal. Secure with toothpicks and reduce the bake time so the chicken doesn’t dry out.
Storage and Reheating
- Refrigerator: Store leftovers in an airtight container for up to 3 days. The chicken stays good, though the filling firms up as it chills.
- Freezer: This freezes, but the ricotta texture gets a little grainier after thawing. Freeze individual portions tightly wrapped, then thaw in the fridge before reheating.
- Reheating: Warm covered in a 325°F oven until heated through, or use short bursts in the microwave at medium power. High heat dries out the chicken before the center is warm, so go slow.
Answers to the Questions Worth Asking
Lemon Ricotta Stuffed Chicken Breast
Ingredients
Equipment
Method
- Preheat your oven to 375°F (190°C) and line a baking dish with parchment or lightly grease it.
- In a medium bowl, mix the whole milk ricotta, Parmesan, lemon zest, lemon juice, minced garlic, basil, parsley, salt, black pepper, and red pepper flakes if using, and stir until smooth and well combined.
- Pat the chicken breasts dry with paper towels.
- Cut a deep horizontal pocket into the thickest side of each chicken breast, being careful not to cut all the way through.
- Season the outside of each chicken breast on both sides with garlic powder, onion powder, paprika, Italian seasoning, salt, and black pepper.
- Spoon the ricotta filling into each pocket, press the opening closed, and secure with 1–2 toothpicks if needed.
- Heat olive oil in a large oven-safe skillet over medium-high heat until shimmering.
- Sear the stuffed chicken breasts for 3–4 minutes per side until deep golden brown.
- Transfer the skillet to the preheated oven and bake for 20–25 minutes until the internal temperature reaches 165°F (74°C).
- Remove the chicken from the oven and let it rest for 5 minutes before removing toothpicks and slicing.
- Serve with fresh lemon slices, extra fresh basil or parsley, and a drizzle of olive oil or pan juices.