
The first time I filled a muffin tin with pumpkin custard, I brought each cup almost to the brim. The filling puffed and wobbled in the oven, and moving the pan felt like a careful balancing act. Leaving a little room at the top makes these mini pumpkin pies much easier to bake and transfer, without skimping on that smooth pumpkin center.
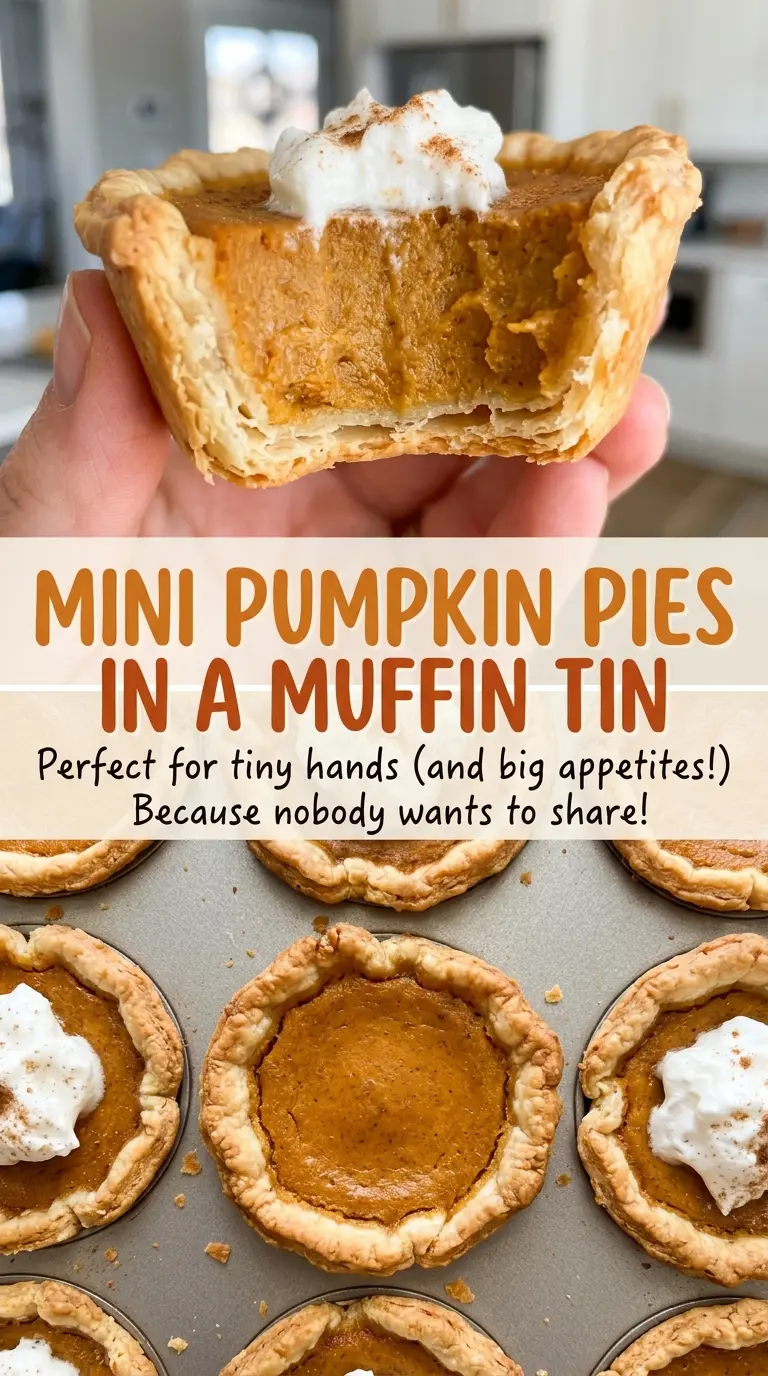
These mini pumpkin pies in a muffin tin use refrigerated pie crusts, so there’s no need to mix and roll pastry from scratch. I cut the rounds with a 4-inch cutter, press one into each cup, and whisk the filling in a single bowl. The oven temperature starts high, then drops while the pies stay inside; that gradual finish gives the custard time to set without rushing it. Each little pie has a tender crust and a gently spiced center, ready to chill on a rack before serving.

Kitchen Note
Leave about 1/4 inch between the filling and the top of each crust. The custard needs a little breathing room, and that small gap makes a full muffin tin much easier to carry to the oven.
Save these mini pumpkin pies for a small-batch dessert with flaky pastry and a smooth, gently spiced pumpkin filling.
Why the Oven Drops From 400°F to 350°F After Ten Minutes
The two temperatures have different jobs. Starting at 400°F gives the pastry a head start while the filling begins to warm. Then lowering the oven to 350°F lets the pumpkin custard finish more gently. The pies stay in the oven during the temperature change, so you don’t lose heat by opening the door or moving the pan.
Pumpkin filling can look deceptively soft near the end of baking. That doesn’t mean it needs a long extra stretch in the oven: the centers should barely jiggle, and the middle of a pie should reach 160°F. Pulling them when they meet both cues helps avoid baking the custard past its set point. The edges firm up first; the center is meant to remain just a little tender.
This is also why I use a standard 12-cup muffin tin rather than changing the pan size. Each pie has the same depth of filling, which makes the stated baking sequence and doneness cues useful across the whole batch. Smaller or larger cups would change how quickly the centers heat, so keep the rounds and muffin cups consistent for an even bake.
What Pumpkin, Evaporated Milk, and Pie Crust Each Bring
- Pumpkin puree — Plain canned pumpkin gives the filling its body and unmistakable pumpkin taste. Choose puree, not canned pumpkin pie filling, which is already sweetened and spiced and would throw off the balance. A standard grocery-store can works well; there’s no need to seek out a specialty brand.
- Evaporated milk — This concentrated milk makes the filling creamy while keeping it thick enough to set in these small pies. It isn’t the same as sweetened condensed milk, and regular milk isn’t a like-for-like replacement because it has a different concentration. Use the full can for the smooth, pourable custard this recipe needs.
- Eggs — The eggs help the pumpkin filling set into a sliceable custard as it bakes and cools. Whisk them thoroughly with the pumpkin and sugar before adding the milk so the mixture comes together evenly. Large eggs are the size to use here.
- Pumpkin pie spice — A prepared blend gives every bite a balanced mix of warm spice without measuring several separate spices. Fresh, fragrant spice makes the most noticeable difference; if the jar smells faint, the baked filling will taste muted. Whisk it into the pumpkin mixture rather than sprinkling it over the tops.
- Refrigerated pie crusts — The ready-rolled crusts make quick work of the pastry and are easy to cut into matching rounds. Handle them gently so the rounds don’t stretch as you press them into the muffin cups. Reroll the scraps as needed to cut all twelve.
- Granulated sugar — It sweetens the filling and dissolves into the wet ingredients as you whisk. Ordinary granulated sugar is the right choice; a coarse or strongly flavored alternative would change how the custard tastes and mixes.
Cut, Fill, and Bake the Pies Without Guessing
Fit the Crusts Into the Muffin Tin
Heat the oven to 400°F and coat the cups of a 12-cup standard muffin tin with cooking spray. Unroll the two refrigerated pie crusts and cut twelve 4-inch rounds, rerolling scraps as needed. Press one round gently into each cup, guiding it into place rather than pulling it thin. A stretched crust is more likely to tear as you fill the cups.
Whisk a Smooth Pumpkin Custard
In a medium bowl, whisk together the pumpkin puree, sugar, eggs, pumpkin pie spice, and salt. Once the mixture looks even, whisk in the evaporated milk until smooth. Pause to scrape the bowl if you see streaks of pumpkin or spice clinging to the sides. A uniform filling divides more evenly among the crusts.
Divide the Filling and Start at High Heat
Spoon or pour the filling into the crusts, stopping with about 1/4 inch of space at the top of each. Try to distribute it evenly so the pies finish baking at roughly the same time. Bake for 10 minutes at 400°F. Keep the muffin tin in the oven when you lower the temperature; taking it out would interrupt the steady bake.
Lower the Heat, Then Cool Before Moving
Reduce the oven to 350°F and bake for another 18–24 minutes. Look for set edges and centers that barely jiggle, then check that the center of a pie has reached 160°F. Cool the pies in the pan for 20 minutes before loosening the crusts and transferring them to a wire rack. Cool them completely and refrigerate within 2 hours of baking.
Two Ways to Adapt the Pumpkin Filling and Crust
Make Crustless Pumpkin Custard Cups
For a crust-free version, leave out the pie crusts and coat the muffin cups with cooking spray before dividing in the filling. Use the same two oven temperatures and bake until the centers reach 160°F; without pastry, these are best eaten from the cups with a spoon rather than loosened and lifted like pies. The result is a softer, custard-forward dessert.
Make a Milder, Less-Spiced Batch
For a gentler pumpkin taste, leave the pumpkin pie spice out of the filling and keep the rest of the ingredients and baking method the same. The pies will still have the pumpkin-and-custard texture, but the warm spice note will be much quieter. This is a useful adjustment if you prefer the pumpkin itself to lead.
Storage and Reheating
- Refrigerator: Keep the cooled pies covered in the refrigerator for up to 3–4 days. The crust gradually softens where it meets the custard.
- Freezer: These freeze well. Once cool, wrap the pies individually and place them in an airtight freezer container for up to 1 month; thaw in the refrigerator before serving.
- Reheating: They’re best chilled or brought briefly to room temperature, so reheating isn’t necessary. Avoid microwaving, which can warm the custard unevenly and soften the crust further.
Questions That Come Up With Muffin-Tin Pumpkin Pies
Mini Pumpkin Pies in a Muffin Tin
Ingredients
Equipment
Method
- Heat the oven to 400°F.
- Coat the cups of a 12-cup standard muffin tin with cooking spray.
- Unroll the pie crusts and cut twelve 4-inch rounds, rerolling scraps as needed.
- Gently press one round into each muffin cup.
- In a medium bowl, whisk together the pumpkin puree, granulated sugar, eggs, pumpkin pie spice, and salt.
- Whisk in the evaporated milk until smooth.
- Divide the filling evenly among the crusts, leaving about 1/4 inch of space at the top of each.
- Bake for 10 minutes at 400°F.
- Without removing the pies, reduce the oven to 350°F and bake for 18–24 minutes, until the edges are set, the centers barely jiggle, and the center of a pie reaches 160°F.
- Cool in the pan for 20 minutes.
- Loosen the crusts and transfer the pies to a wire rack.
- Cool and refrigerate within 2 hours of baking.