
Silky pumpkin filling and tall, sugar-crusted biscuits make this cobbler land somewhere between a custard pie and a warm bakery dessert, and that’s exactly why it gets attention at the table. The filling sets just enough to hold a spoonful, while the biscuit topping stays crisp on top and tender where it sinks into the pumpkin. Spoon warm caramel over the top and the whole thing turns glossy, rich, and hard to stop eating.
What makes this version work is the way the filling and topping bake in stages. The pumpkin base goes in first so it can thicken before the biscuits are added, which keeps the topping from disappearing into the custard. Cold butter in the biscuit dough matters too; it gives you those flaky pockets and a taller finish instead of a dense, dumpling-like lid.
Below, I’ve broken down the parts that matter most: how to keep the filling from staying loose, why the biscuit dough should look shaggy before it hits the pan, and how to keep the caramel smooth instead of grainy. If you’ve ever wanted a pumpkin dessert that feels rustic but still special, this one earns its place.
The pumpkin layer set up perfectly and the biscuits stayed crisp on top even after we spooned on the caramel. I was worried the topping would sink, but it baked up tall and flaky just like the photos.
Pin this pumpkin cobbler for the nights when you want spiced pumpkin, flaky biscuits, and warm caramel all in one spoonful.
The Reason the Pumpkin Layer Gets Set Before the Biscuits Go On
The biggest mistake with cobbler-style pumpkin desserts is adding the topping to a filling that’s still too loose. That sounds harmless, but the dough sinks, the center turns gummy, and the biscuits lose the lift that makes them worth eating. Baking the pumpkin base first gives the eggs time to start setting the custard so the biscuits can sit on top instead of melting into it.
That partial bake also changes the texture at the boundary between the filling and the topping. The bottom of the biscuits gets just enough steam from the custard to stay tender, while the tops dry out enough to brown and crisp. You end up with contrast in every bite, which is what keeps this from tasting like ordinary pumpkin pudding with dough dropped on top.
What Each Ingredient Is Actually Doing in This Cobbler

- Pumpkin purée — Use pure pumpkin, not pumpkin pie filling. The canned purée gives you control over the sugar and spice, and the texture stays smooth instead of overly soft.
- Evaporated milk — This adds richness without making the custard heavy. Regular milk works in a pinch, but the filling won’t taste as round or bake up as velvety.
- Eggs — They’re the structure here. If you cut them, the filling stays loose and won’t slice or spoon cleanly after baking.
- Brown sugar — It deepens the pumpkin flavor and gives the custard a faint molasses note that plain white sugar can’t match. Light brown sugar is enough; dark brown sugar will push it further toward caramel.
- Buttermilk — The acidity helps the biscuit topping stay tender and gives it a subtle tang that balances the sweet filling. If you don’t have it, use milk mixed with a little lemon juice or vinegar and let it sit for 5 minutes.
- Cold butter — This is what creates the flaky biscuit texture. Warm butter disappears into the dough and leaves you with a dense topping instead of layers.
- Turbinado sugar — It’s not just for looks. Those coarse crystals give the biscuit tops a crackly finish that makes each bite more interesting.
How to Bake the Filling, Top It, and Still Keep the Biscuits Tall
Building the Pumpkin Base
Whisk the pumpkin filling until it’s completely smooth and pour it into the greased dish. Once it goes into the oven, it should look glossy and thin at first, then start to lose that wet sheen around the edges. If you pull it too early, the biscuits will sink because the custard won’t have enough body to support them.
Cutting the Butter Into the Dough
Work the cold butter into the flour mixture until you still see pea-sized pieces. Those little pockets melt in the oven and create lift. If the mixture turns sandy and uniform, the butter got too warm or was blended too far, and the biscuits will bake up flat.
Dropping and Finishing the Topping
Spoon the dough over the partially baked filling in generous mounds rather than spreading it flat. Gaps between the biscuits are fine; they allow the filling to bubble up around the edges and help the topping bake evenly. Brush with melted butter and add the turbinado sugar so the tops brown deeply instead of staying pale.
Cooking the Caramel Without Crystallizing It
Heat the sugar alone until it melts into a smooth amber liquid, then whisk in the butter and cream carefully. If the sugar seizes or looks grainy, the heat was too high or the pan wasn’t stirred enough. Keep the whisk moving and expect bubbling when the cream goes in; that’s normal and it settles quickly into a pourable sauce.
Three Ways to Adapt This Pumpkin Cobbler Without Losing the Texture
Dairy-Free Version With the Same Custardy Feel
Use full-fat coconut milk in place of the evaporated milk, plant-based butter in the biscuits, and a dairy-free caramel made with coconut cream. The filling will taste a little richer and slightly coconut-forward, but it still sets beautifully because the eggs do the structural work.
Gluten-Free Biscuit Topping
Swap in a good 1:1 gluten-free flour blend that already includes xanthan gum. The topping won’t rise quite as high as the wheat version, but keeping the butter cold and handling the dough lightly still gives you a tender, crisp-edged biscuit layer.
Make It Ahead for Easier Serving
Bake the cobbler earlier in the day, then rewarm it before serving so the biscuits stay crisp on top. The caramel can be made ahead and gently rewarmed with a splash of cream if it thickens too much.
Smaller Bake for a Quieter Dessert Night
Halve the recipe and bake it in an 8×8-inch dish if you don’t need a full pan. The timing drops a bit, but the same visual cues still matter: the filling should be set around the biscuits, and the tops should be deep golden brown.
Storage and Reheating
- Refrigerator: Store covered for up to 4 days. The biscuits soften a little, but the flavor holds.
- Freezer: It freezes best without the caramel sauce. Wrap tightly and freeze for up to 2 months, then thaw overnight in the refrigerator.
- Reheating: Warm individual portions in a 325°F oven until heated through. The microwave makes the biscuit topping rubbery, so use it only for short bursts if you have to.
Answers to the Questions Worth Asking
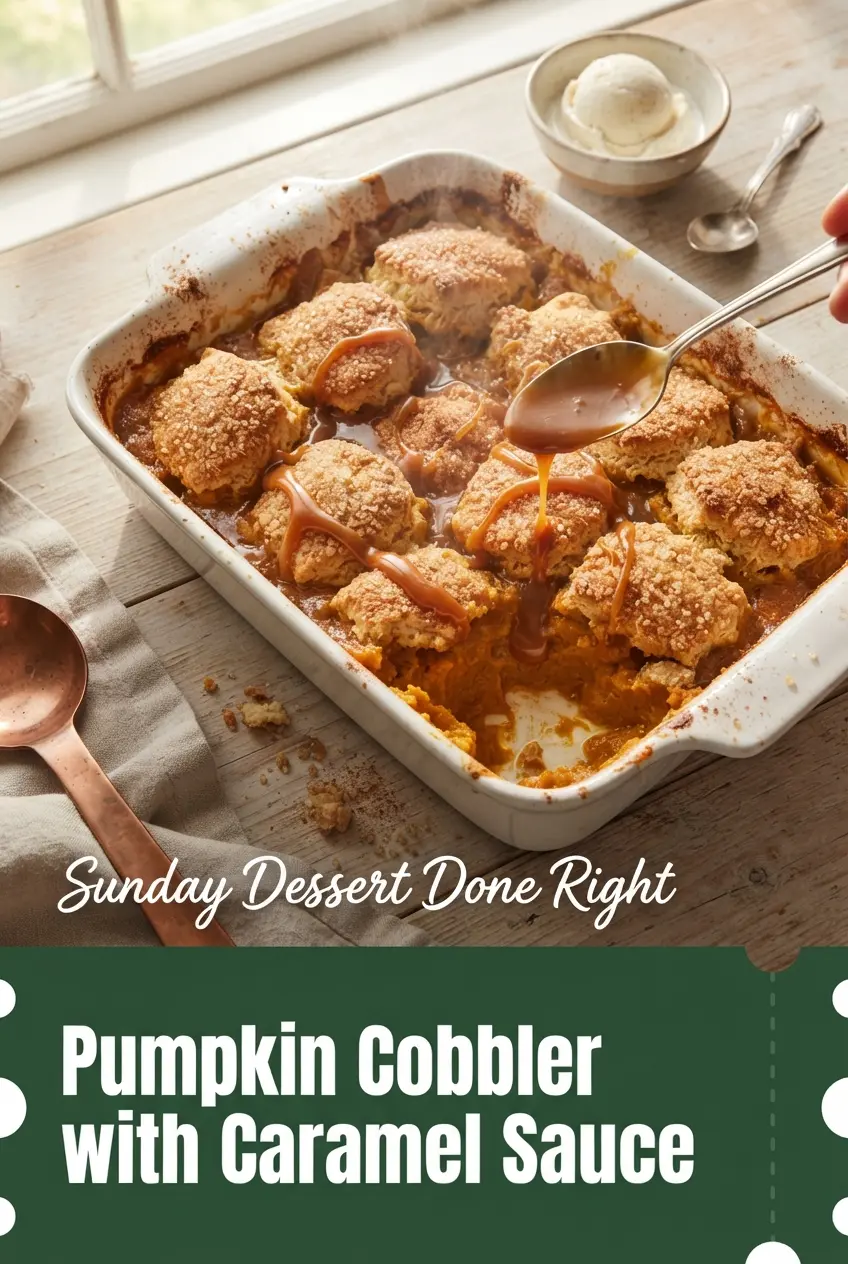
Old-Fashioned Pumpkin Cobbler with Biscuit Topping and Caramel Sauce
Ingredients
Equipment
Method
- Preheat the oven to 375°F (190°C) and grease a 9x13-inch baking dish, so it’s ready for the filling. Set the dish aside.
- Whisk the pumpkin purée, evaporated milk, eggs, brown sugar, pumpkin pie spice, vanilla, and salt until smooth. Stop when no streaks remain for a silky custard.
- Pour the filling into the prepared dish and bake for 20 minutes, until the edges begin to set. Look for gentle bubbling and a slightly firm perimeter.
- Whisk the flour, granulated sugar, baking powder, cinnamon, and salt in a large bowl. Mix until evenly combined.
- Cut in the cold butter with a pastry cutter or your fingertips until the mixture looks like coarse crumbs with some pea-sized pieces. Keep the butter cold so the biscuits rise.
- Stir in the cold buttermilk and vanilla with a fork just until a thick, shaggy dough forms. Do not overmix.
- Remove the baking dish from the oven and drop 12 large spoonfuls of biscuit dough evenly over the partially set filling. Leave gaps so steam can escape.
- Brush the biscuits with melted butter and sprinkle with turbinado sugar. You should see a light, sparkly coating.
- Return to the oven and bake for 25–30 minutes, until the biscuits are tall and deep golden brown and the filling is set around them. The center should not jiggle like loose custard.
- Heat the granulated sugar in a medium saucepan over medium heat, stirring constantly with a heatproof spatula, until it melts into a smooth amber liquid. Watch closely so it doesn’t burn.
- Whisk in the butter until melted. The caramel will look glossy and cohesive.
- Slowly pour in the heavy cream while whisking (it will bubble up), then boil for 1 minute. Keep whisking until the sauce is smooth.
- Remove from the heat and stir in the vanilla and salt until fully combined. The sauce should be pourable and silky.
- Let the cobbler rest for 15 minutes, so the filling firms up and the biscuits settle. Skim off any pooling sauce only if needed.
- Scoop into bowls and pour warm caramel sauce over each serving. Serve while hot so the sauce stays fluid.